
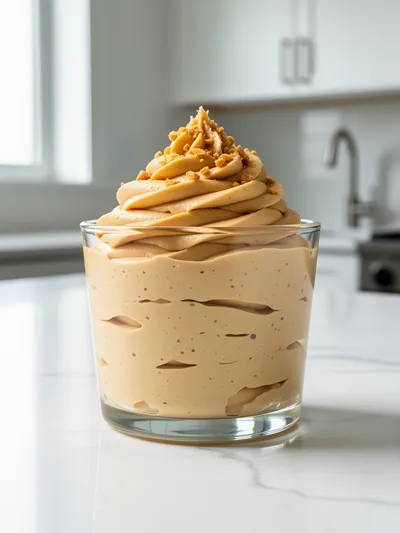
Oreo balls, sometimes called Oreo truffles, emerged as a popular no-bake dessert in the early 2000s, capturing the essence of convenience cooking while delivering luxurious flavor. The combination of crushed cookies and cream cheese creates a texture that's both familiar and surprisingly sophisticated, making these treats equally at home at casual potlucks and formal holiday tables. Their rise coincided with the growing popularity of bite-sized desserts that could be made ahead, reflecting how modern home cooks balance busy schedules with the desire for homemade comfort.
Why You'll Love It
-
No baking required - perfect for hot summer days
-
Only 3 main ingredients for such impressive results
-
Great for making ahead and freezing for last-minute guests
-
Kids can help with every step of the process
"My family begs for these every Christmas! So easy and always a hit."
Essential Ingredient Guide
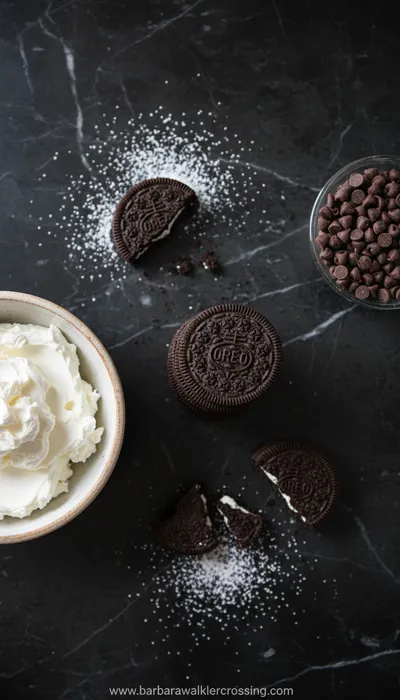
- Oreo cookies: The classic sandwich cookies provide both the crunch and creaminess. Use regular Oreos for traditional flavor, or try different varieties like mint or golden for variation.
- Cream cheese: Full-fat cream cheese works best here - it binds the crumbs together while adding a subtle tang that balances the sweetness. Let it soften at room temperature for easier mixing.
- Chocolate coating: Good quality chocolate chips or melting wafers make all the difference in the final texture. The chocolate should melt smoothly and set with a satisfying snap.
Complete Cooking Process
-
Ingredient Readiness:
Let the cream cheese sit out until it's soft to the touch, but not melted. This makes blending with the cookie crumbs much easier and prevents overmixing.
-
Flavor Development:
As the Oreo balls chill, the flavors meld together beautifully. The cookie crumbs absorb moisture from the cream cheese, creating a rich, fudgy texture that's reminiscent of comfort food but in dessert form.
-
Texture Control:
Chilling the formed balls thoroughly before dipping is crucial - it prevents them from falling apart in the warm chocolate and helps the coating set quickly for that perfect snap.
-
Finishing Touches:
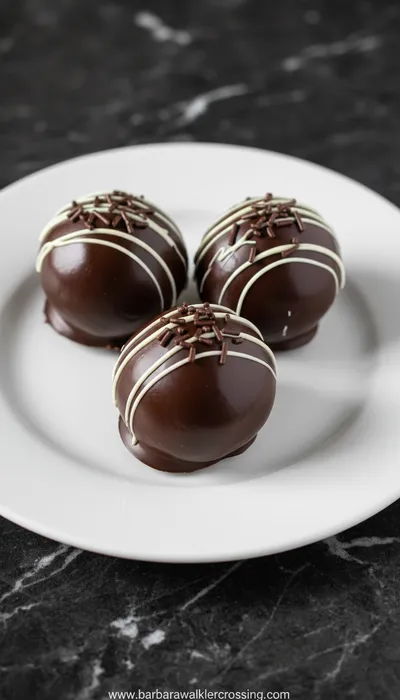
The final drizzle of white chocolate or sprinkle of crushed cookie crumbs adds both visual appeal and textural contrast, making each bite more interesting.
-
Serving Timing:
Serve slightly chilled for the best texture - cold enough to hold their shape but not so cold that the chocolate coating becomes too hard to bite through comfortably.
-
Use a food processor for the finest, most even cookie crumbs
-
Chill your hands before rolling the balls to prevent sticking
-
Melt chocolate in short bursts, stirring frequently
-
Work quickly when dipping to maintain chocolate temperature
Pro Tips
You know, the first time I made these, I was rushing and didn't chill the balls long enough. Well, let's just say I ended up with Oreo blobs instead of balls. The chocolate coating slid right off, and honestly, it was a bit of a mess. But you live and learn, right?
Now I set a timer and wait the full hour. It makes all the difference. The way the chilled balls dip into that warm chocolate... it's like they know exactly how to cooperate. I mean, isn't it funny how the simplest recipes often teach you the most about patience?
The essence of the dish:
What makes these Oreo balls special is how they transform everyday ingredients into something that feels both nostalgic and celebratory. The contrast between the crisp chocolate shell and the soft, almost brownie-like interior creates a sensory experience that's simple yet deeply satisfying.
A fun fact or historical angle:
While Oreo cookies have been around since 1912, the trend of turning them into no-bake balls gained popularity in the early 2000s as home cooks sought easy yet impressive desserts for potlucks and holiday gatherings.
Flavor or sensory focus:
The most noticeable thing when you bite into one is the way the chocolate coating gives way to that creamy, cookie-filled center. It's a texture combination that feels indulgent yet familiar, much like the comforting warmth of a roasted vegetable soup on a cold day.
You Must Know
-
Don't skip the chilling step - it's essential for proper texture
-
Use a cookie scoop for evenly sized balls
-
Store in an airtight container between layers of parchment
-
Freeze extras for up to 3 months
Frequently Asked Questions
→ Can I use reduced-fat cream cheese?
You can, but the texture might be slightly less creamy. Full-fat cream cheese gives the best results for binding and flavor.
→ How long do Oreo balls last in the refrigerator?
They'll keep well for about a week when stored in an airtight container. The chocolate coating helps preserve them.
→ Can I make these without a food processor?
Absolutely! Place the cookies in a zip-top bag and crush them with a rolling pin. It might take a bit more effort, but it works just fine.
→ What's the best way to melt the chocolate?
I prefer the double boiler method for even melting, but the microwave works too - just stir every 30 seconds to prevent scorching.
→ Can I use different types of cookies?
Definitely! Golden Oreos, mint Oreos, or even other sandwich cookies work beautifully. Adjust the cream cheese amount if the cookies are larger or smaller.
→ Why are my Oreo balls falling apart?
This usually means they need more chilling time, or you might need slightly more cream cheese to bind the crumbs together.
Nutrition Facts
per serving
150
Calories
2g
Protein
16g
Carbs
9g
Fat
Taste Profile
Rich chocolate cookie flavor with creamy undertones
Ingredient Substitutions
Don't have an ingredient? Try these alternatives
Mascarpone creates a richer texture, while yogurt makes them lighter
White chocolate provides a sweeter, creamier alternative
Recipe Variations
Try these delicious twists on the original
Peppermint Twist
Add 1/2 teaspoon peppermint extract to the mixture and use crushed candy canes for topping
Cookie Dough Style
Use Golden Oreos and add mini chocolate chips to mimic chocolate chip cookie dough
Common Mistakes to Avoid
Learn from others' mistakes for perfect results
- Not chilling balls long enough before dipping
- Overheating the chocolate causing it to seize
- Rolling balls too large making them difficult to dip
- Using cold cream cheese that doesn't blend properly
Meal Prep & Storage
Make Ahead Tips
You can make these up to 3 days in advance and store in the refrigerator, or freeze for up to 3 months. The flavor actually improves after a day as the ingredients meld together.
Leftover Ideas
Reheat is not recommended. Enjoy cold from the refrigerator. If frozen, thaw in the refrigerator for several hours before serving.
Perfect Pairings
Serve this with...
Cooking Timeline
Crush cookies and mix with cream cheese
Roll mixture into balls and place on baking sheet
Chill balls in refrigerator until firm
Melt chocolate and dip chilled balls
Add decorations and final chill before serving
 Baking, Bread & Sweet Comforts
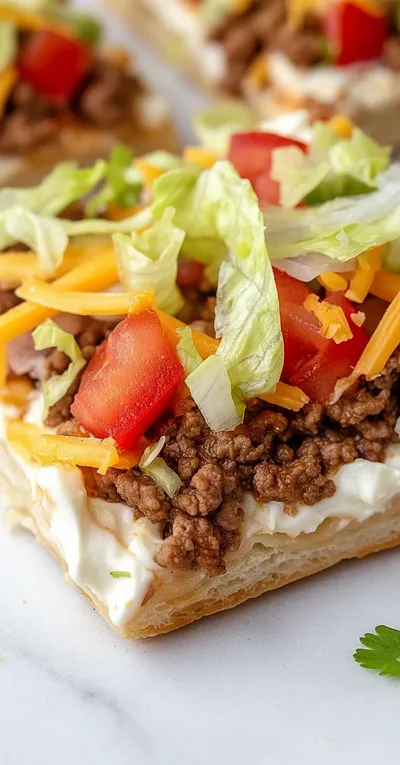
Crescent Roll Taco Pizza Recipe
A fast, cheesy taco‑pizza made on buttery crescent rolls, perfect for snack or casual dinner.
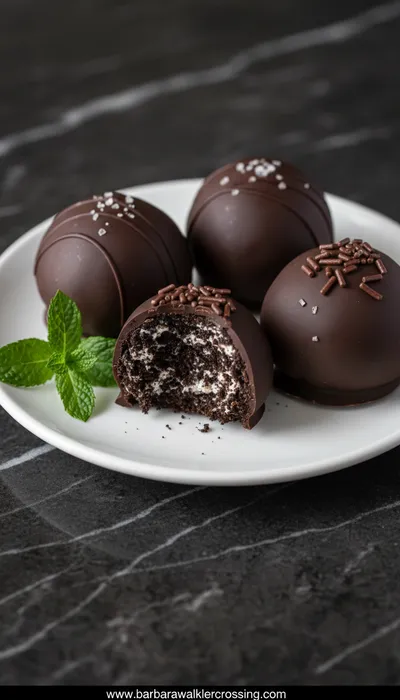
Oreo Balls Recipe
Easy no-bake Oreo balls coated in rich chocolate make for a delicious dessert treat that everyone will love, perfect for holiday gatherings or simple family nights.
Timing
Prep Time
20 Minutes
Cook Time
0 Minutes
Total Time
1 Hour 20 Minutes
Recipe Details
Ingredients
Main Ingredients
-
01
1 package (14.3 oz) Oreo cookies
-
02
8 oz cream cheese, softened
-
03
16 oz chocolate melting wafers or chocolate chips
Optional Toppings
-
01
2 oz white chocolate, melted for drizzling
-
02
Extra crushed Oreo crumbs for sprinkling
-
03
Sprinkles or colored sugar for holidays
Instructions
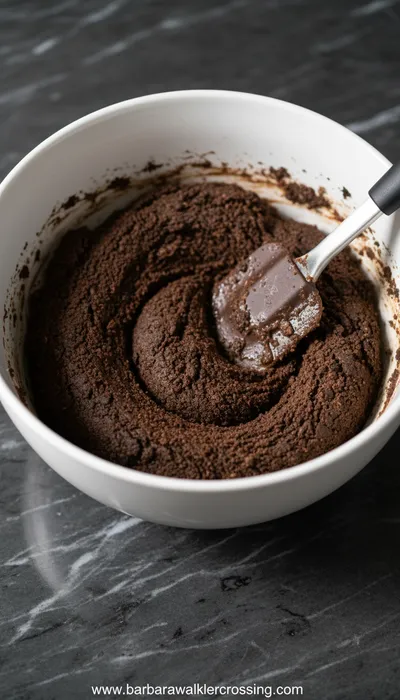
Place the Oreo cookies (cream filling included) in a food processor and pulse until fine crumbs form. You should have about 3 cups of crumbs. If you don't have a food processor, place cookies in a zip-top bag and crush with a rolling pin.
In a medium bowl, combine the Oreo crumbs with the softened cream cheese. Mix until well combined and the mixture holds together when pressed. The texture should be like a firm cookie dough.
Using a small cookie scoop or tablespoon, portion the mixture and roll into 1-inch balls. Place them on a parchment-lined baking sheet. Chill in the refrigerator for at least 1 hour, or until firm.
Melt the chocolate according to package directions. Using a fork or dipping tool, dip each chilled ball into the melted chocolate, tapping off the excess. Return to the parchment-lined baking sheet.
If desired, drizzle with melted white chocolate or sprinkle with additional crushed cookies while the chocolate is still wet. Return to the refrigerator for 15-20 minutes to set completely before serving.
Notes & Tips
-
1
For best results, chill the formed balls thoroughly before dipping - this prevents them from falling apart in the warm chocolate
-
2
Store leftovers in an airtight container in the refrigerator for up to a week, or freeze for up to 3 months
-
3
If the mixture is too soft to roll, chill it for 15-20 minutes before forming balls
 Baking, Bread & Sweet Comforts
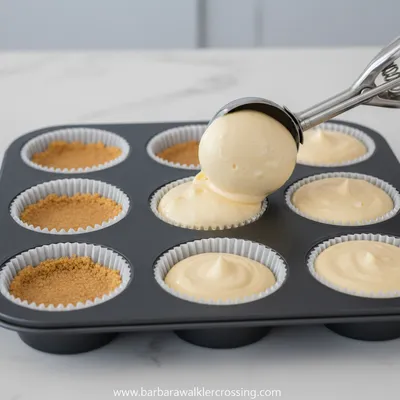
Mini Cheesecakes Recipe
Creamy, sweet mini cheesecakes with a buttery crust, ideal for any occasion.
Tools You'll Need
-
Food processor or zip-top bag and rolling pin
-
Mixing bowls
-
Baking sheets
-
Parchment paper
-
Cookie scoop or tablespoon
-
Fork or dipping tool
Must-Know Tips
-
Chill your hands before rolling the balls to prevent sticking
-
Work in small batches when dipping to keep the chocolate at the right temperature
-
Tap the fork gently against the bowl to remove excess chocolate for a neat finish
Professional Secrets
-
Room temperature cream cheese blends more evenly with cookie crumbs
-
A double boiler prevents chocolate from scorching during melting
-
Adding a teaspoon of coconut oil to melting chocolate creates a shinier finish

Recipe by
Hannah BrooksFlour, love, and a warm oven 🥖🔥 Baking comfort and happiness one delicious creation at a time ❤️
Get Delicious Recipes Weekly
Join 25,000+ home cooks getting our best recipes straight to their inbox.
Free forever • No spam • Unsubscribe anytime