
The origins of the Oreo cookie date back to 1912, and its beloved crunch has inspired countless variations. Over decades, home cooks have found ways to repurpose the classic sandwich cookie into bite‑size confections. The practice of coating baked or no‑bake treats in chocolate grew popular in the mid‑20th century, as families sought simple desserts that required no oven. Butterfinger Balls variant share a similar ethos, celebrating the marriage of candy and chocolate.
Why You'll Love It
-
- No oven needed, perfect for hot days
-
- Ready in under 30 minutes
-
- Crunchy cookie center meets silky chocolate
-
- Easy to scale for any crowd
-
- Kid‑friendly fun to roll and coat
“These little balls are a hit at every potluck—so simple yet so satisfying!”
Essential Ingredient Guide
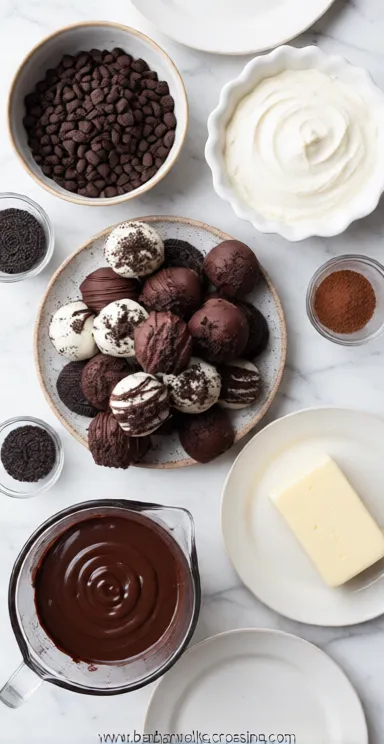
- Oreo cookies: Choose classic chocolate‑cream Oreos; gently crush for even texture.
- Cream cheese: Provides moisture and a subtle tang that balances the sweetness.
- Powdered sugar: Sweetens the mixture without adding grainy texture.
- Chocolate chips: Use semi‑sweet or milk chocolate for coating; melt gently.
- Vanilla extract: A few drops enhance the buttery aroma.
- Optional sprinkles: Add color and a tiny crunch if desired.
Complete Cooking Process
-
Ingredient Readiness:
Crush cookies, soften cream cheese, and measure sugar before you start.
-
Flavor Development:
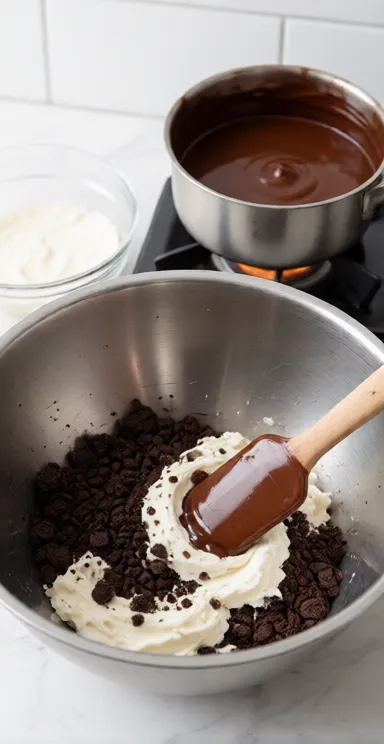
Mix crushed cookies with cream cheese and sugar, letting the flavors meld.
-
Texture Control:
Roll the mixture into balls; the chill helps the dough hold shape.
-
Finishing Touches:
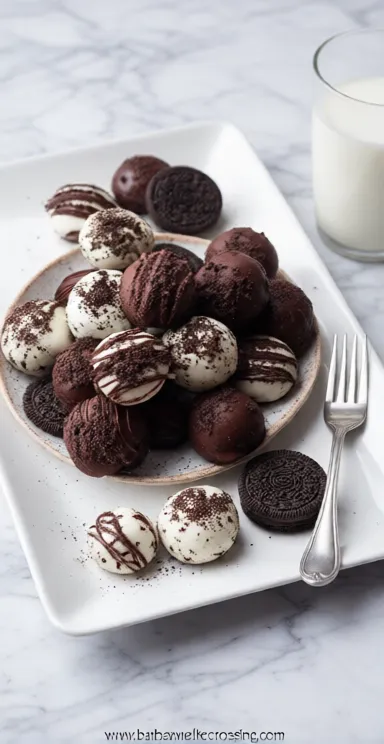
Dip each ball in melted chocolate, then set on parchment to harden.
-
Serving Timing:
Serve once chocolate has set; they stay soft inside for the best bite.
-
Cool the cookie mixture at least 20 minutes before shaping.
-
Use a double boiler or microwave in short bursts to melt chocolate smoothly.
-
Work with one hand dry and the other damp to avoid sticking.
Pro Tips
Well, those little tricks can make the difference between a sticky mess and perfectly smooth spheres. I’ve found that a quick chill after rolling keeps the balls firm enough to dip without breaking. Also, a dash of sea salt on the chocolate right before it sets adds a subtle contrast that many guests love.

The essence of the dish:
A simple combination of crushed cookies, a silky cream cheese binder, and a glossy chocolate coat creates a bite‑size indulgence that feels both nostalgic and fresh.
A fun fact or historical angle:
The first Oreo‑based dessert appeared in the 1970s, when home bakers began experimenting with cookie crumbs for cheesecake bases.
Flavor or sensory focus:
Expect the initial snap of chocolate, followed by the creamy, slightly tangy center that melts gently on the tongue.
You Must Know
-
Work quickly once the chocolate is melted.
-
Chill the balls before coating for a smoother finish.
-
Store in an airtight container to keep the crunch.
Frequently Asked Questions
→ Can I use a different cookie?
Yes, try chocolate wafer or graham crackers for a different flavor profile.
→ What chocolate works best?
Semi‑sweet or milk chocolate melts nicely; dark chocolate adds a richer taste.
→ How long can I store them?
Keep refrigerated in an airtight container for up to a week.
→ Can I freeze the balls?
Absolutely; freeze for up to three months, then thaw briefly before serving.
→ Do I need special equipment?
A food processor for crushing and a microwave‑safe bowl for melting chocolate are enough.
→ Are they kid‑friendly?
Yes, just supervise the chocolate melting step; the rest is safe for children.
Nutrition Facts
per serving
180
Calories
2g
Protein
21g
Carbs
10g
Fat
Taste Profile
Rich chocolate with a sweet cookie core
Ingredient Substitutions
Don't have an ingredient? Try these alternatives
Provides similar tang; may need extra powdered sugar.
Creates a sweeter, vanilla‑forward flavor.
Recipe Variations
Try these delicious twists on the original
Spicy Version
Add a pinch of cayenne and drizzle with a hint of sriracha for a subtle kick.
Mediterranean Style
Mix in finely chopped pistachios and a drizzle of honey before coating.
Common Mistakes to Avoid
Learn from others' mistakes for perfect results
- Skipping the chill step, resulting in misshapen balls.
- Overheating chocolate, causing a grainy coating.
- Using stale Oreo cookies, which reduces sweetness.
Meal Prep & Storage
Make Ahead Tips
You can form and chill the balls up to 2 days ahead; melt chocolate and coat just before serving.
Leftover Ideas
Reheat gently in a microwave for a few seconds to soften the chocolate if it hardens in the fridge.
Perfect Pairings
Serve this with...
Cooking Timeline
Gather and measure all ingredients, crush cookies.
Mix crumbs with cream cheese, sugar, and vanilla.
Form balls and chill.
Melt chocolate and coat chilled balls.
Add toppings and let chocolate set.
 Baking, Bread & Sweet Comforts
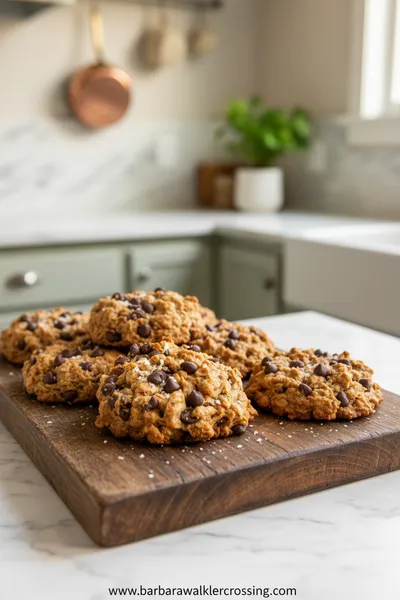
High Protein Cookie Dough
Nutritious cookie dough loaded with protein, easy to whip up and enjoy any time.
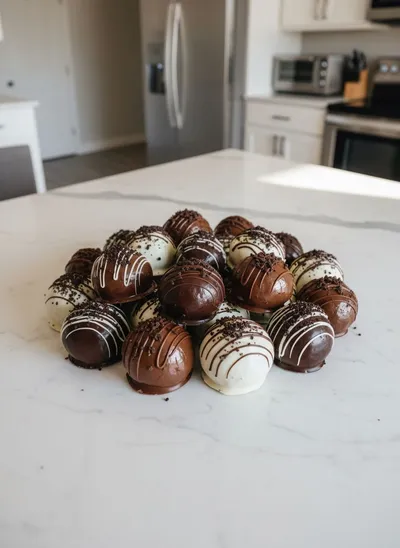
Oreo Balls Recipe – Easy No‑Bake Treat
Discover the sweet, crunchy joy of Oreo Balls treat, a quick no‑bake delight perfect for celebrations.
Timing
Prep Time
15 Minutes
Cook Time
0 Minutes
Total Time
30 Minutes
Recipe Details
Ingredients
Main Ingredients
-
01
24 Oreo cookies, finely crushed
-
02
8 oz cream cheese, softened
-
03
1/4 cup powdered sugar
-
04
1 tsp vanilla extract
-
05
12 oz chocolate chips, melted
Optional Extras
-
01
Sprinkles, for decoration
-
02
Sea salt flakes, for topping
Instructions
Place crushed Oreos in a large bowl; set aside.
Add softened cream cheese, powdered sugar, and vanilla; mix until a smooth dough forms.
Roll the mixture into 1‑inch balls, place on parchment, and chill for 20 minutes.
Melt chocolate chips gently; dip each chilled ball into chocolate, letting excess drip off.
Lay coated balls on parchment; sprinkle with optional toppings and let set.
Notes & Tips
-
1
If the dough feels too sticky, add a bit more powdered sugar.
-
2
For a richer coating, let the chocolate cool slightly before dipping.
-
3
Store in a single layer to prevent balls from sticking together.
Tools You'll Need
-
Food processor or zip‑top bag and rolling pin
-
Mixing bowl
-
Spatula
-
Microwave‑safe bowl
-
Parchment paper
-
Cooling rack
Must-Know Tips
-
Don't over‑mix the dough; it can become gummy.
-
Let chocolate set at room temperature for a glossy finish.
-
Taste the dough before shaping; adjust sweetness if needed.
Professional Secrets
-
Room temperature cream cheese blends evenly with crumbs.
-
Melting chocolate over low heat prevents scorching.
-
A quick chill firms the dough, making rolling effortless.

Recipe by
Barbara WalkerCooking with heart and heritage 🥘❤️ Sharing nostalgic flavors, family comfort, and timeless kitchen love ✨
Get Delicious Recipes Weekly
Join 25,000+ home cooks getting our best recipes straight to their inbox.
Free forever • No spam • Unsubscribe anytime