
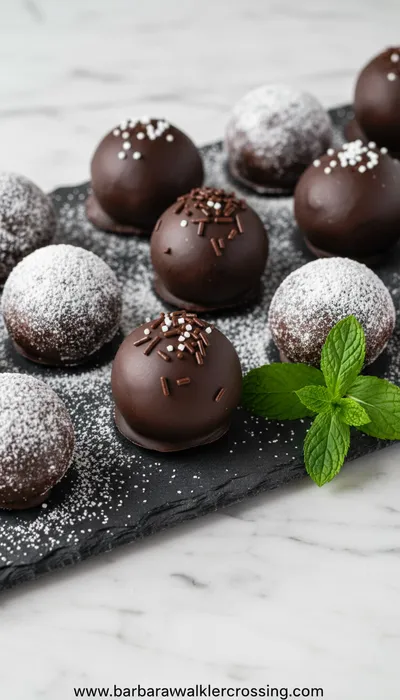
The humble Oreo cookie, first introduced in 1912, has long been a staple of American pantries. Its iconic design and satisfying crunch have made it a favorite for generations. The innovation of transforming these cookies into no-bake truffles is a more recent delight, showcasing how a simple ingredient can be reinvented into an elegant, shareable treat. This method highlights the cookie's versatility and deep chocolate flavor in a new, creamy form.
Why You'll Love It
-
No baking required, just mix and chill.
-
Incredibly easy, perfect for beginner bakers.
-
Uses only a few simple ingredients you might already have.
-
Always a crowd-pleaser at parties and gatherings.
"I made these for a potluck and they were gone in minutes! So simple and so delicious."
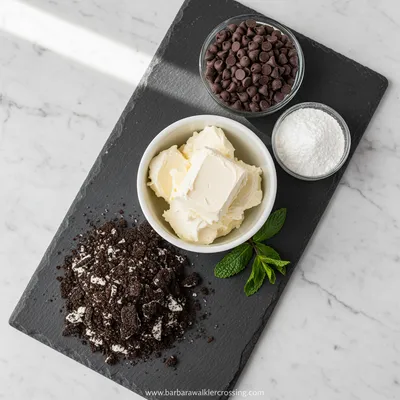
Essential Ingredient Guide
- Oreo Cookies: The star of the show. Use the regular kind for that classic flavor. You'll crush them up fine, cream filling and all, which gives the balls their structure and rich taste.
- Cream Cheese: This is the magic binder that holds everything together. Make sure it's softened to room temperature so it blends smoothly with the cookie crumbs without any lumps.
- Chocolate Melting Wafers: For that beautiful, smooth coating. I find the candy melts are easier to work with than chocolate chips because they set up nicely and don't require tempering. Choose dark, milk, or white chocolate based on your preference.
- Shortening: Just a tiny bit mixed into the melting wafers makes the chocolate coating more fluid and gives it a lovely sheen, making dipping so much easier.
- Sprinkles: Totally optional, but they add such a festive touch. Add them right after dipping while the chocolate is still wet for the best stick.
- Vanilla Extract: A little splash in the melted chocolate can deepen the flavor profile, making the coating taste even more decadent.
Complete Cooking Process
-
Ingredient Readiness:
Letting the cream cheese soften on the counter is crucial. Cold cream cheese just won't blend properly and you'll end up with a lumpy mixture. The cookies need to be crushed into fine, even crumbs for a smooth texture.
-
Flavor Development:
The flavor really comes together when the cookie crumbs and cream cheese are mixed. The saltiness of the cream cheese balances the sweetness of the cookies perfectly. Chilling the formed balls is when the flavors meld and the texture firms up.
-
Texture Control:
The key to the perfect truffle texture is the initial chill. It makes the balls firm enough to handle for dipping without falling apart. The chocolate coating sets up to a satisfying snap when you bite into it.
-
Finishing Touches:
Dipping the chilled balls quickly and evenly is the final step. Adding sprinkles or a drizzle of contrasting chocolate not only looks pretty but adds a little extra texture and flavor.
-
Serving Timing:
These are best served chilled. The cool, firm center against the crisp chocolate shell is what makes them so special. They can soften if left out too long, so keep them refrigerated until just before serving.
-
Use a food processor for the quickest, most even cookie crumbs.
-
A small cookie scoop ensures all your balls are the same size for even chilling and dipping.
-
If the mixture is too sticky, chill it for 15 minutes before rolling.
-
Use a fork to dip and tap off excess chocolate for a cleaner finish.
Pro Tips
You know, I've found that patience is the real secret ingredient here. Rushing the chilling steps is the biggest mistake. Letting the balls get properly firm in the fridge makes the dipping process so much smoother, honestly. It's like letting a good soup simmer; the wait is worth it. And don't worry if your first few dipped balls aren't perfect. Mine never are. It's a learning curve, and even the slightly messy ones taste just as wonderful. They have character, I think.
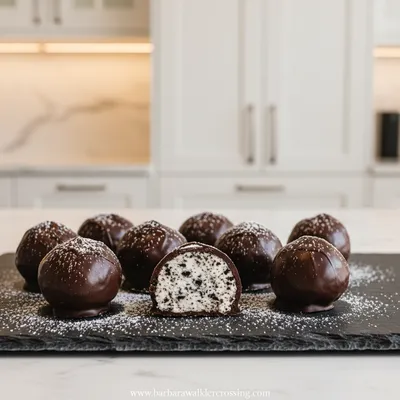
The essence of the dish:
It's all about that contrast – the crisp chocolate shell giving way to a soft, creamy, intensely Oreo-flavored center. It feels a little fancy but is deceptively simple to make.
A fun fact or historical angle:
The Oreo cookie itself has been around since 1912, making it over a century old. Turning it into a truffle is a modern twist on a classic that everyone recognizes.
Flavor or sensory focus:
The first thing you'll notice is the satisfying snap of the chocolate coating. Then, the rich, cool, and creamy cookie center melts in your mouth. It's pure, sweet comfort.
You Must Know
-
Softened cream cheese is non-negotiable for a smooth mix.
-
Chill the balls thoroughly before dipping or they'll fall apart.
-
Melting wafers are more reliable for coating than plain chocolate chips.
-
Work quickly when dipping to keep the chocolate fluid.
Frequently Asked Questions
→ Can I use reduced-fat cream cheese?
I wouldn't recommend it. The full-fat version has the right consistency and richness to bind the crumbs properly. The reduced-fat kind can make the mixture too wet and soft.
→ How long do Oreo balls keep?
They'll stay perfect in an airtight container in the refrigerator for up to a week. You can also freeze them for up to 3 months. Just thaw in the fridge before serving.
→ My chocolate coating is too thick. What can I do?
Try adding a tiny bit more shortening to the melted wafers, just a teaspoon at a time, until it reaches a thinner, more dippable consistency.
→ Can I make these without a food processor?
Absolutely. Just put the cookies in a sturdy zip-top bag and crush them with a rolling pin. It might take a little more effort to get them super fine, but it works just fine.
→ What's the best way to drizzle chocolate on top?
I put a little melted chocolate in a small zip-top bag, snip a tiny corner off, and then gently squeeze it over the balls in a zigzag pattern. It's much easier than trying to use a spoon.
→ Can I use different types of cookies?
Oh, for sure! This method works with many sandwich cookies. Golden Oreos or even mint-filled ones are delicious. It's a great way to experiment, much like trying a new garden vegetable soup with different seasonal produce.
Nutrition Facts
per serving
150
Calories
2g
Protein
16g
Carbs
9g
Fat
Taste Profile
Rich, sweet, and deeply chocolatey with a creamy finish.
Ingredient Substitutions
Don't have an ingredient? Try these alternatives
Melt together gently. The coating may not set as firm but will still taste great.
This will create an even richer, softer center.
Recipe Variations
Try these delicious twists on the original
Peppermint Oreo Balls
Add 1/2 teaspoon of peppermint extract to the cream cheese mixture and use dark chocolate for coating. Perfect for the holidays.
Peanut Butter Oreo Balls
Replace the cream cheese with an equal amount of smooth peanut butter for a nutty twist.
Common Mistakes to Avoid
Learn from others' mistakes for perfect results
- Using cold cream cheese leads to a lumpy mixture.
- Skipping or shortening the chilling time results in balls that fall apart during dipping.
- Overheating the chocolate can cause it to seize and become clumpy.
Meal Prep & Storage
Make Ahead Tips
You can make the uncoated balls and keep them refrigerated for up to 2 days before dipping. The finished balls keep well for a week.
Leftover Ideas
Leftovers should be stored in the fridge. They are best enjoyed cold.
Perfect Pairings
Serve this with...
Cooking Timeline
Crush Oreos and mix with cream cheese.
Roll mixture into balls and place on baking sheet.
Chill balls in refrigerator until firm.
Melt chocolate and dip chilled balls.
Let chocolate set before serving.

Oreo Balls Recipe
Honestly, these Oreo balls are just the easiest little treats. They come together in no time at all, and the whole house smells like sweet chocolate and cookies. I remember making these for the first time for my nephew's birthday, and wow, they disappeared so fast I had to make another batch.
Timing
Prep Time
30 Minutes
Cook Time
0 Minutes
Total Time
2 Hours 30 Minutes
Recipe Details
Ingredients
For the Balls
-
01
1 package (14.3 oz) regular Oreo cookies
-
02
8 oz brick-style cream cheese, softened to room temperature
For the Coating
-
01
12 oz chocolate melting wafers (dark, milk, or white)
-
02
1 teaspoon vegetable shortening
Optional Toppings
-
01
Sprinkles
-
02
Crushed Oreo crumbs
-
03
Drizzle of contrasting color melting wafers
Instructions
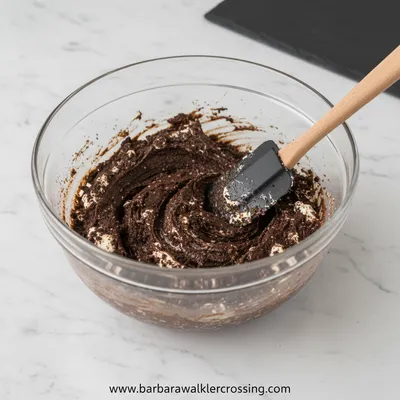
First, place the entire package of Oreo cookies (cream filling included) into a food processor. Pulse until they become fine, even crumbs. You can also do this by placing the cookies in a sturdy zip-top bag and crushing them with a rolling pin. Transfer the crumbs to a medium mixing bowl.
Add the softened cream cheese to the cookie crumbs. Use a hand mixer or a sturdy spoon to mix until it's completely combined and a thick, uniform dough forms. It will be a bit sticky, and that's okay. It reminds me of when I'm making a hearty potato soup, where you just need to stir until everything comes together smoothly.
Line a baking sheet with parchment paper. Using a small cookie scoop or a tablespoon, portion the mixture and roll it into 1-inch balls with your hands. Place each ball on the prepared baking sheet. If your hands get too sticky, lightly dampening them with water can help.
Once all the mixture is rolled, cover the baking sheet with plastic wrap and refrigerate for at least 2 hours, or until the balls are very firm. This step is crucial for easy dipping. You can even chill them overnight.
When you're ready to coat them, melt the chocolate wafers with the teaspoon of shortening in a microwave-safe bowl. Heat in 30-second intervals, stirring well after each, until smooth and fluid.
Using a fork or a dipping tool, dip each chilled ball into the melted chocolate, turning to coat completely. Let the excess chocolate drip off, then place it back on the parchment paper. Immediately add sprinkles or toppings before the chocolate sets.
Let the chocolate coating set completely at room temperature, or for a quicker set, pop them back in the refrigerator for about 15 minutes. Once set, they're ready to serve and enjoy!
Notes & Tips
-
1
Store leftovers in an airtight container in the refrigerator.
-
2
For a fun variation, try using Golden Oreos or adding a bit of peppermint extract to the mixture.
-
3
These freeze beautifully for up to 3 months.
 Baking, Bread & Sweet Comforts
High Protein Cookie Dough
Nutritious cookie dough loaded with protein, easy to whip up and enjoy any time.
Tools You'll Need
-
Food processor or zip-top bag and rolling pin
-
Mixing bowls
-
Hand mixer or sturdy spoon
-
Baking sheet
-
Parchment paper
-
Microwave-safe bowl
-
Fork or dipping tool
Must-Know Tips
-
Ensure cream cheese is fully softened for a lump-free mixture.
-
Chill the rolled balls thoroughly – this is the key to success.
-
Melt chocolate slowly to avoid seizing or burning.
Professional Secrets
-
Room temperature cream cheese ensures a smooth, even blend.
-
A bit of shortening in the chocolate creates a thinner, more professional-looking coating.
-
Chilling the balls on the fork for a moment after dipping helps set the bottom.

Recipe by
Barbara WalkerCooking with heart and heritage 🥘❤️ Sharing nostalgic flavors, family comfort, and timeless kitchen love ✨
Get Delicious Recipes Weekly
Join 25,000+ home cooks getting our best recipes straight to their inbox.
Free forever • No spam • Unsubscribe anytime