
Tacos have traveled across centuries, from humble Mexican street stalls to tables worldwide. The concept of holding the filling in a sturdy, fried corn cup emerged in the early 20th century as a practical way to serve soups and stews without soggy bread. Over time, the cup became a playful vessel for all kinds of toppings, allowing cooks to layer textures and flavors in a single bite. This tradition of convenience meets flavor, offering a nostalgic nod to those bustling market stalls where the aroma of cooking corn mingles with fresh herbs.
Why You'll Love It
-
- Ready in under 30 minutes, perfect for impromptu gatherings
-
- Crunchy shell holds moisture, keeping toppings fresh
-
- Flexible: swap proteins, try beans or shrimp
-
- Minimal cleanup; everything cooks in one pan
"These taco cups were the star of our game night—easy, tasty, and everyone kept asking for the recipe!"
Essential Ingredient Guide
- Corn taco shells: Choose sturdy, restaurant‑style shells; they hold the fillings without bending.
- Ground beef or turkey: Season well; the fat adds richness while the spices bring depth.
- Shredded cheese: Adds creamy melt and balances the spicy notes.
- Taco seasoning blend: A mix of cumin, chili powder, and garlic gives authentic flavor.
- Lime juice: A splash brightens the dish and lifts the meat’s richness.
- Fresh cilantro: Adds herbal freshness; tear leaves gently to avoid bruising.
Complete Cooking Process
-
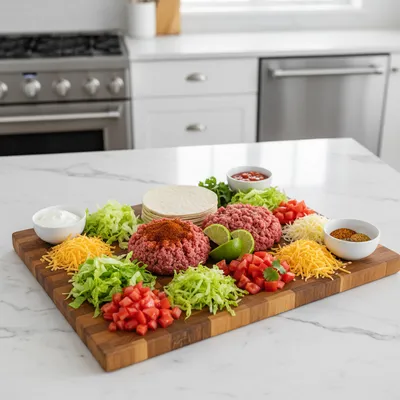
Ingredient Readiness:
Gather all toppings, shred cheese, and have lime wedges at hand; this prevents scrambling mid‑cook.
-
Flavor Development:
Brown the meat with seasoning; let it caramelize for a few minutes to deepen the flavor.
-
Texture Control:
Warm the taco shells just until lightly crisp—overheating makes them soggy.
-
Finishing Touches:
Add cheese, cilantro, and a drizzle of lime right before serving for freshness.
-
Serving Timing:
Serve immediately while shells retain their crunch and toppings stay cool.
-
Pat the meat dry before browning; it sears better.
-
Warm shells on a low oven rack for 2 minutes, not microwave.
-
Layer cheese first so it melts over the hot meat.
-
Add a splash of sour cream after plating for creaminess.
Pro Tips
Honestly, these small steps make a world of difference. I’ve found that taking a moment to let the shells settle on a cooling rack preserves that satisfying snap. Also, a quick squeeze of lime right before you serve awakens every layer, turning a simple snack into a little celebration of flavor.

The essence of the dish:
It’s the contrast between the crisp corn shell and the moist, seasoned meat that makes these cups unforgettable.
A fun fact or historical angle:
The original taco cup was invented in Texas in the 1930s as a portable way to serve taco soup.
Flavor or sensory focus:
You’ll notice the warm, earthy spice of cumin followed by the bright pop of citrus and the gentle coolness of cilantro.
You Must Know
-
Use fresh lime for brightness
-
Don’t overfill shells—keep them stable
-
Serve immediately for maximum crunch
Frequently Asked Questions
→ Can I make these ahead of time?
Yes, you can prep the fillings and store them refrigerated; reheat the shells briefly before assembling.
→ What protein works best?
Ground beef or turkey are classic, but you can substitute shredded chicken, black beans, or even seasoned tofu.
→ How do I keep the shells from getting soggy?
Warm them briefly in the oven, and add wet ingredients like salsa after they’re already on the plate.
→ Can I freeze the assembled cups?
It’s best to freeze only the cooked meat; assemble fresh shells when you’re ready to serve.
→ What’s a good vegan alternative?
Use seasoned lentils or crumbled tempeh, and replace cheese with a plant‑based melt.
→ How spicy can I make them?
Add chopped jalapeños or a dash of hot sauce to the meat; adjust to taste.
Nutrition Facts
per serving
280
Calories
18g
Protein
22g
Carbs
14g
Fat
Taste Profile
A balanced blend of savory meat, tangy lime, and mild heat.
Ingredient Substitutions
Don't have an ingredient? Try these alternatives
Adjust seasoning for tofu; press it first to remove excess moisture.
Choose a meltable variety for best texture.
Recipe Variations
Try these delicious twists on the original
Spicy Version
Add sliced jalapeños and a drizzle of hot sauce for a gentle kick.
Mediterranean Style
Substitute the meat with seasoned chickpeas, add feta, olives, and sun‑dried tomatoes.
Common Mistakes to Avoid
Learn from others' mistakes for perfect results
- Overcrowding the pan, which steams the meat instead of browning.
- Warming shells too long, making them hard instead of crisp.
- Adding too much sauce, causing the shells to become soggy.
Meal Prep & Storage
Make Ahead Tips
Season and cook the meat up to a day ahead; store in the fridge and gently reheat before assembling the cups.
Leftover Ideas
Reheat meat in a skillet with a splash of water; crisp shells in the oven for a few minutes before refilling.
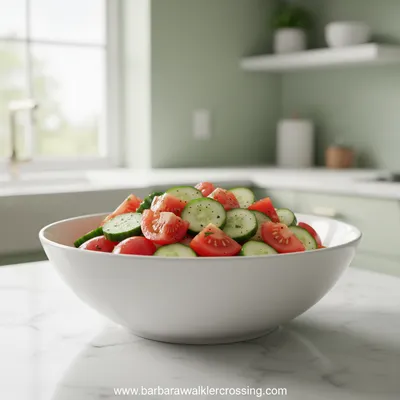
Perfect Pairings
Serve this with...
Cooking Timeline
Gather and prep all ingredients; dice vegetables and measure spices.
Brown ground meat in skillet, add seasoning and simmer.
Warm taco shells in the oven until lightly crisp.
Assemble cups with meat, cheese, and fresh toppings; finish with lime.

Easy Taco Cups
Delicious Easy Taco Cups are quick, tasty, and perfect for casual gatherings. Enjoy a crunchy taco shell filled with flavorful toppings.
Timing
Prep Time
15 Minutes
Cook Time
15 Minutes
Total Time
30 Minutes
Recipe Details
Ingredients
Main Ingredients
-
01
6 small corn taco shells
-
02
1 lb ground beef or turkey
-
03
1 packet taco seasoning (or homemade blend)
-
04
1/2 cup water
-
05
1 cup shredded cheddar cheese
-
06
1/4 cup chopped fresh cilantro
Toppings
-
01
1/2 cup diced tomatoes
-
02
1/4 cup diced red onion
-
03
1 avocado, sliced
-
04
Lime wedges for serving
-
05
Sour cream (optional)
Instructions
Preheat a large skillet over medium heat; add the ground meat and crumble it, cooking until browned.
Stir in the taco seasoning and water, simmer for 3‑4 minutes until the sauce thickens and coats the meat.
While the meat cooks, place the taco shells on a baking sheet and warm them in a 350°F oven for about 2 minutes, just until lightly crisp.
Fill each warm shell with a spoonful of seasoned meat, then sprinkle shredded cheese on top.
Add fresh toppings—tomatoes, onion, avocado, and cilantro—then finish with a squeeze of lime and a dollop of sour cream if desired.
Notes & Tips
-
1
Avoid overfilling shells to keep them from collapsing.
-
2
If using pre‑made shells, check the package for recommended warming instructions.
-
3
For extra flavor, add a pinch of smoked paprika to the meat.
 Homestyle & Traditional Recipes
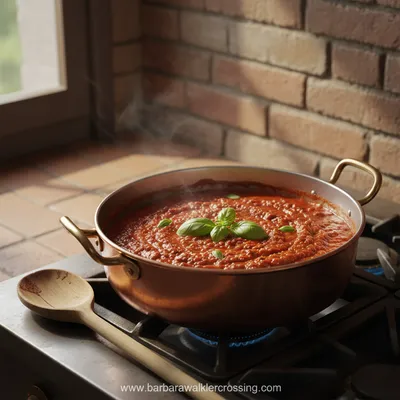
Traditional Bolognese Sauce Recipe
A classic Italian meat sauce that simmers to perfection with rich, comforting flavors
Tools You'll Need
-
Large skillet
-
Baking sheet
-
Rubber spatula
-
Sharp knife
-
Measuring spoons
-
Small serving bowls
Must-Know Tips
-
Don’t overcrowd the pan, cook meat in batches if needed.
-
Let the shells cool briefly before adding wet toppings.
-
Taste the seasoned meat before assembling to adjust salt.
Professional Secrets
-
Room temperature meat sears evenly, preventing steaming.
-
A quick burst of high heat creates a caramelized crust on the meat.
-
Finish with a splash of lime to brighten all flavors.

Recipe by
Isabella MooreCelebrating life with flavor 🎉🍽️ Creating magical seasonal dishes full of warmth, joy, and delicious taste ✨
Get Delicious Recipes Weekly
Join 25,000+ home cooks getting our best recipes straight to their inbox.
Free forever • No spam • Unsubscribe anytime