
These vintage no‑bake cookies trace back to the 1930s when home cooks needed desserts that could be made without a hot oven during summer heat waves. The recipe spread through community cookbooks, prized for its speed and comforting flavor. Modern bakers still cherish the legacy, finding that a dash of nostalgia adds depth beyond the sweet taste.
Why You'll Love It
-
- No oven needed, perfect for warm days
-
- Soft, chewy texture that melts in your mouth
-
- Simple pantry staples you likely already have
-
- Quick to make, great for spontaneous cravings
"These cookies bring back the warmth of my grandma’s kitchen, simple yet unforgettable,"
Essential Ingredient Guide
- Rolled oats: Provides heartiness; choose thick‑cut for the best chew
- Cocoa powder: Gives rich depth; use unsweetened for balanced flavor
- Brown sugar: Adds caramel warmth; adjust for sweetness level
- Butter: Creates silky coating; melt slowly to avoid scorching
- Milk: Helps bind the mixture; whole milk yields a richer mouthfeel
- Vanilla extract: A tiny splash lifts the entire flavor profile
Complete Cooking Process
-
Ingredient Readiness:
Measure oats, cocoa, sugar, and butter; have milk and vanilla on hand.
-
Flavor Development:
Melt butter, sugar, and cocoa together; the aroma signals the turning point.
-
Texture Control:
Stir in oats quickly; keep the mixture moving to avoid soggy spots.
-
Finishing Touches:
Drop spoonfuls onto parchment; let cool to set the glaze.
-
Serving Timing:
Serve once the cookies firm up—usually 10 minutes at room temperature.
-
Use a heavy‑bottomed saucepan for even heat distribution.
-
Work quickly when adding oats so the mixture stays glossy.
-
If you like a crunchier edge, spread cookies thinly.
-
Store in an airtight container to keep them soft.
Pro Tips
I find that a short pause while the cookies set on the countertop lets the flavors marry nicely. It’s a quiet moment—just you, the faint scent of cocoa, and the comforting hum of the kitchen. Feel free to experiment with a pinch of sea salt for contrast, or a drizzle of melted chocolate after they cool.

The essence of the dish:
A buttery, cocoa‑kissed bite that feels like a hug from an old friend, with oats giving gentle body and brown sugar adding caramel notes.
A fun fact or historical angle:
During wartime rationing, cooks used oats and cocoa as affordable luxuries, making these cookies a small indulgence.
Flavor or sensory focus:
Expect a warm, sweet scent as the butter melts, a smooth chocolate coating, and a comforting chew that softens on the tongue.
You Must Know
-
Do not over‑cook; the mixture should be glossy, not grainy.
-
Cool on parchment, not a metal tray, to avoid soggy bottoms.
-
Use fresh oats for best texture.
Frequently Asked Questions
→ Can I use quick‑cooking oats?
Yes, but the texture will be softer; rolled oats give the classic chew.
→ What if I don’t have cocoa powder?
Swap with melted chocolate chips; reduce a tablespoon of butter to balance richness.
→ How long do they keep?
Stored airtight, they stay soft for up to a week at room temperature.
→ Can I make them gluten‑free?
Use certified gluten‑free rolled oats and ensure all other ingredients are gluten‑free.
→ Is it okay to add nuts?
Absolutely—chopped walnuts or pecans add pleasant crunch.
→ Do I need to refrigerate them?
Not necessary unless you prefer a firmer texture; they set nicely at room temperature.
Nutrition Facts
per serving
120
Calories
2g
Protein
18g
Carbs
5g
Fat
Taste Profile
Warm, sweet, chocolate‑kissed comfort
Ingredient Substitutions
Don't have an ingredient? Try these alternatives
Coconut oil adds a faint tropical note; adjust milk slightly.
Use 3/4 cup maple syrup; it adds depth but reduces firmness a bit.
Recipe Variations
Try these delicious twists on the original
Spicy Version
Add a pinch of cayenne pepper and a dash of cinnamon for subtle heat.
Mediterranean Style
Stir in crumbled feta and chopped kalamata olives after the oats, for a savory twist.
Common Mistakes to Avoid
Learn from others' mistakes for perfect results
- Over‑cooking the glaze, which makes it grainy.
- Adding oats too early, causing them to absorb too much liquid.
- Skipping the cooling time, resulting in soft, sticky cookies.
Meal Prep & Storage
Make Ahead Tips
You can mix the glaze and store it refrigerated for up to 2 days; reheat gently before combining with oats.
Leftover Ideas
Reheat gently in a skillet with a splash of milk if they have hardened.
Perfect Pairings
Serve this with...
Cooking Timeline
Gather and measure all ingredients.
Melt butter, add brown sugar and cocoa; stir until smooth.
Stir in milk and vanilla; bring to a gentle simmer.
Remove from heat, fold in oats and salt quickly.
Spoon onto parchment, let cool and set.
 Baking, Bread & Sweet Comforts
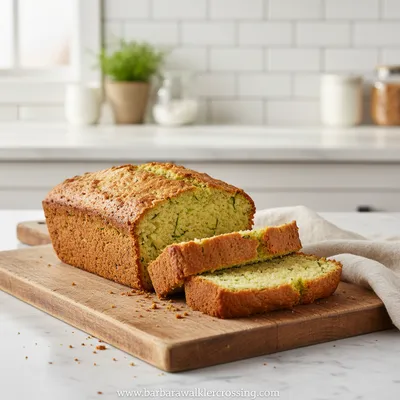
High Protein Cookie Dough
Nutritious cookie dough loaded with protein, easy to whip up and enjoy any time.
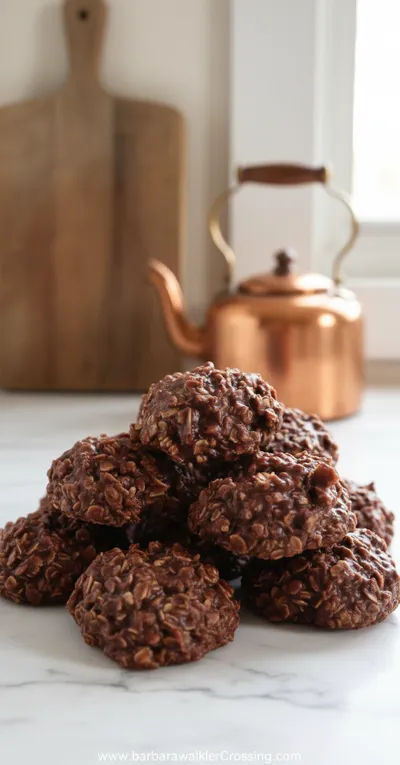
Vintage No-Bake Cookies Recipe
Enjoy classic comfort with these quick Vintage No-Bake Cookies—chewy, sweet, and ready without an oven. A gentle nod to old‑school kitchens where the stovetop ruled and the scent of butter and sugar filled the house.
Timing
Prep Time
10 Minutes
Cook Time
5 Minutes
Total Time
15 Minutes
Recipe Details
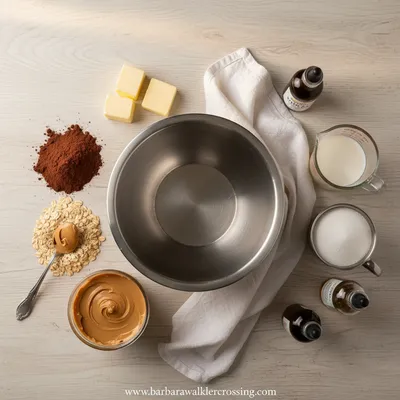
Ingredients
Main Ingredients
-
01
2 cups rolled oats
-
02
1/2 cup unsweetened cocoa powder
-
03
1 cup brown sugar
-
04
1/2 cup butter
-
05
1/4 cup milk
-
06
1 tsp vanilla extract
-
07
Pinch of salt
Instructions
In a medium saucepan, melt the butter over low heat; add brown sugar and stir until dissolved.
Stir in cocoa powder, milk, and vanilla; keep the mixture moving until it becomes a smooth, glossy glaze.
Remove from heat and fold in rolled oats and a pinch of salt; mix quickly so each oat is coated.
Drop spoonfuls onto a parchment‑lined tray; let them cool for about 10 minutes until set.
Optional: drizzle melted chocolate or sprinkle a little sea salt on top for extra flavor.
Notes & Tips
-
1
If the mixture looks too thick, add a splash more milk.
-
2
For a nuttier twist, fold in 1/4 cup toasted shredded coconut.
-
3
Allow the cookies to cool completely before storing to prevent sticking.
Tools You'll Need
-
Medium saucepan
-
Wooden spoon
-
Measuring cups and spoons
-
Parchment paper
-
Spoon or small ice‑cream scoop
Must-Know Tips
-
Don’t over‑heat the butter; it can scorch and turn bitter.
-
Work quickly after adding oats for a glossy finish.
-
Store in an airtight container to maintain softness.
Professional Secrets
-
Low heat keeps sugar from caramelizing too quickly.
-
A heavy‑bottomed pan distributes heat evenly, preventing lumps.
-
Cooling on parchment stops steam from making cookies soggy.

Recipe by
Barbara WalkerCooking with heart and heritage 🥘❤️ Sharing nostalgic flavors, family comfort, and timeless kitchen love ✨
Get Delicious Recipes Weekly
Join 25,000+ home cooks getting our best recipes straight to their inbox.
Free forever • No spam • Unsubscribe anytime