
Vanilla, first cultivated by the Totonac people of present‑day Mexico, traveled across oceans to become a global favorite. By the 19th century, French chefs refined the vanilla bean into the sweet, aromatic ingredient we cherish today. Its delicate fragrance has inspired countless desserts, from simple scoops to elaborate pastries. This recipe honors that lineage by keeping the preparation as straightforward as the bean’s natural elegance, allowing the pure vanilla flavor to shine without distraction.
Why You'll Love It
-
- No need for an ice‑cream maker, just a freezer.
-
- Pure vanilla flavor shines through.
-
- Quick to prepare, perfect for spontaneous cravings.
-
- Gentle sweetness without overwhelming richness.
“The texture is like cloud‑kissed sugar, and the flavor lingers beautifully.”
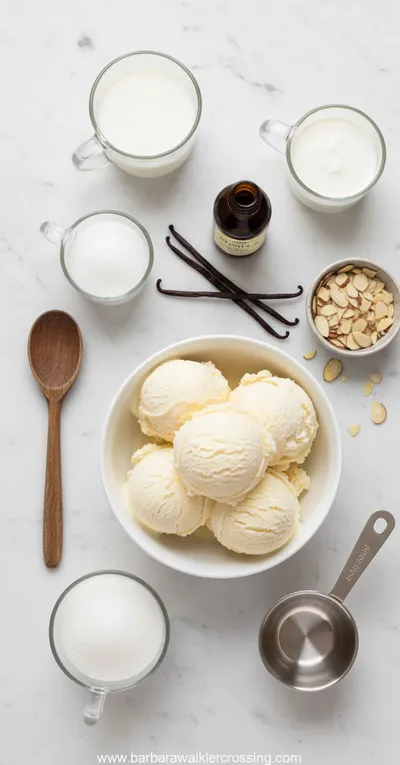
Essential Ingredient Guide
- Heavy cream: Provides a rich mouthfeel; look for cream with at least 35% fat for best texture.
- Whole milk: Balances richness; use fresh, unpasteurized if possible for extra creaminess.
- Vanilla bean or extract: Split the bean, scrape the seeds for depth, or use high‑quality extract for convenience.
- Sugar: Granulated sugar dissolves easily; adjust for personal sweetness level.
- A pinch of salt: Enhances the vanilla flavor and rounds the sweetness.
- Optional mix‑ins (e.g., toasted almond slivers): Add texture and a complementary nutty note just before the final freeze.
Complete Cooking Process
-
Ingredient Readiness:
Measure and chill the cream and milk, split the vanilla bean, and pre‑mix the sugar with a pinch of salt.
-
Flavor Development:
Whisk the vanilla seeds into the milk and cream; the warmth of the room helps release aromatic compounds.
-
Texture Control:
During freezing, stir the mixture every 30 minutes to break up ice crystals, ensuring a silky interior.
-
Finishing Touches:
Fold in any optional mix‑ins just before the final freeze to keep their crunch.
-
Serving Timing:
Let the ice cream sit at room temperature for five minutes before scooping for a smooth release.
-
Cover the container with parchment paper to prevent ice crystals.
-
Use a shallow pan for faster, more even freezing.
-
Taste the base before freezing; adjust sweetness if needed.
-
Store the finished ice cream in an airtight container to avoid freezer burn.
Pro Tips
These little adjustments make a big difference. I remember once forgetting the parchment paper and ending up with a grainy texture—yeah, oops! So, a tiny piece of paper can keep your dessert smooth for days. Also, letting the ice cream soften just a bit before serving brings out that luxurious mouthfeel, making each spoonful feel like a small celebration.
The essence of the dish:
A simple blend of dairy, vanilla, and sugar that transforms into a cloud‑like dessert with barely any effort.
A fun fact or historical angle:
The word ‘vanilla’ comes from the Spanish ‘vaina’, meaning pod, because early explorers thought the beans were similar to peas.
Flavor or sensory focus:
You’ll notice the fragrant vanilla aroma rising as you scoop, followed by a silky, buttery texture that melts slowly on the tongue.
You Must Know
-
Use chilled dairy for quicker freezing.
-
Stir consistently to avoid large ice chunks.
-
Serve slightly softened for the best mouthfeel.
Frequently Asked Questions
→ Can I use a dairy‑free base?
Absolutely—swap heavy cream and milk with coconut cream or almond milk for a luscious alternative.
→ Do I need an ice‑cream maker?
No, this method relies on periodic stirring in the freezer to achieve a smooth texture.
→ How long does it take to freeze?
Roughly 4‑5 hours, with stirring every half hour until it reaches a soft‑serve consistency, then a final firm set.
→ Will the vanilla flavor stay strong?
Using a real vanilla bean or a high‑quality extract ensures a lasting, aromatic taste.
→ Can I add mix‑ins like chocolate chips?
Yes, fold them in during the final stirring stage so they stay evenly distributed.
→ Is this recipe suitable for a paleo diet?
For a paleo vanilla version, replace sugar with maple syrup and use coconut cream instead of dairy.
Nutrition Facts
per serving
210
Calories
3g
Protein
18g
Carbs
14g
Fat
Taste Profile
Delicately sweet with a fragrant vanilla finish
Ingredient Substitutions
Don't have an ingredient? Try these alternatives
Provides similar richness; ensure it's well‑chilled for best texture.
Adds a subtle caramel note; use slightly less as it’s sweeter.
Recipe Variations
Try these delicious twists on the original
Spicy Version
Add a pinch of cinnamon and a dash of cayenne for a warming kick.
Mediterranean Style
Stir in crumbled feta and toasted pine nuts after the final freeze for a savory‑sweet contrast.
Common Mistakes to Avoid
Learn from others' mistakes for perfect results
- Skipping the intermittent stirring leads to grainy texture.
- Using low‑fat dairy results in icy consistency.
- Over‑mixing after the final freeze makes it too soft.
Meal Prep & Storage
Make Ahead Tips
You can whisk the base and chill it overnight; the mixture will develop a deeper vanilla flavor when frozen later.
Leftover Ideas
Re‑scoop into a bowl and let sit at room temperature for a few minutes; stir gently before serving.
Perfect Pairings
Serve this with...
Cooking Timeline
Prepare ingredients, whisk base until sugar dissolves.
Infuse vanilla, pour into pan, place in freezer.
Stir every 30 minutes to break ice crystals.
Add optional mix‑ins, freeze until firm.
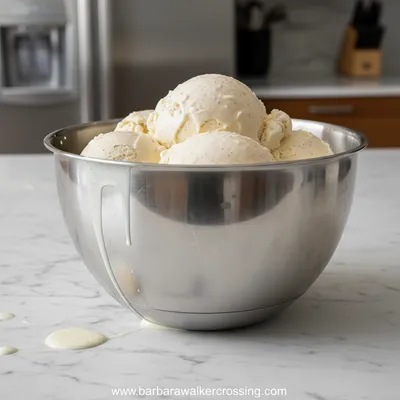
Vanilla Ice Cream Recipe – No‑Cook Method
A silky, homemade vanilla ice cream that comes together without turning on the stove. Perfect for warm days or cozy evenings.
Timing
Prep Time
10 Minutes
Cook Time
0 Minutes
Total Time
4 Hours 30 Minutes
Recipe Details
Ingredients
Base Ice Cream
-
01
2 cups heavy cream
-
02
1 cup whole milk
-
03
¾ cup granulated sugar
-
04
1 vanilla bean, split and seeds scraped
-
05
¼ tsp salt
Optional Mix‑ins
-
01
¼ cup toasted almond slivers
-
02
2 tbsp caramel sauce
Instructions
In a large bowl, combine the heavy cream, whole milk, sugar, and salt; whisk until the sugar dissolves completely.
Add the vanilla seeds (and the pod for extra aroma) to the mixture; let it sit for a few minutes while the vanilla infuses.
Pour the mixture into a shallow metal pan, cover with parchment paper, and place it in the freezer.
After 30 minutes, remove and stir vigorously with a spatula, breaking up any forming ice crystals; repeat every 30 minutes for about 2‑3 hours.
When the texture is smooth and thick, fold in any optional mix‑ins, cover tightly, and freeze until firm, about 1‑2 more hours.
Notes & Tips
-
1
For a almond milk version, replace dairy with almond milk and use a plant‑based cream.
-
2
If you enjoy a richer flavor, increase the cream to 2.5 cups and reduce milk slightly.
-
3
A quick tip: pre‑freeze the mixing bowl; it speeds up the freezing process.

Tools You'll Need
-
Large mixing bowl
-
Whisk
-
Spatula
-
Shallow metal pan
-
Freezer‑safe cover or parchment paper
Must-Know Tips
-
Don’t skip the stirring steps; they keep crystals small.
-
Cover the surface with parchment to prevent ice crystals.
-
Taste the base before freezing; adjust sweetness if needed.
Professional Secrets
-
Use chilled dairy for a faster set.
-
Stir with a swift, circular motion to create fine crystals.
-
Add a pinch of alcohol‑free vanilla extract to enhance aroma without affecting freeze.

Recipe by
Barbara WalkerCooking with heart and heritage 🥘❤️ Sharing nostalgic flavors, family comfort, and timeless kitchen love ✨
Get Delicious Recipes Weekly
Join 25,000+ home cooks getting our best recipes straight to their inbox.
Free forever • No spam • Unsubscribe anytime