
Vanilla ice cream has traveled from the tropical orchards of Mexico to banquet tables worldwide, becoming a timeless classic. Its roots lie in early colonial kitchens where vanilla beans were prized for their fragrance and soothing aroma. Over centuries, the dessert evolved, adapting to new technologies like the hand‑cranked churns of the 19th century, and today the Ninja Creami brings that tradition into modern homes with effortless precision.
Why You'll Love It
-
- Creamy texture without ice crystals
-
- Simple ingredient list, no fancy gadgets
-
- Versatile base for mix‑ins
-
- Nostalgic vanilla flavor that feels home‑cooked
"The smoothness is unforgettable—like licking a cloud,"
Essential Ingredient Guide
- Whole milk: Choose a fresh, high‑fat milk for richness; it creates that luxurious mouthfeel.
- Granulated sugar: Dissolve fully; it balances the vanilla’s natural sweetness.
- Vanilla bean: Scrape the seeds for authentic aroma; the pod can be simmered for extra depth.
- Sea salt: Just a pinch enhances the vanilla’s flavor and rounds the sweetness.
- Cream (optional): Adds silkiness; if you prefer lighter, omit or substitute with almond milk.
- Lemon zest (optional): A tiny zest brightens the profile without overpowering the vanilla.
 Baking, Bread & Sweet Comforts
High Protein Cookie Dough
Nutritious cookie dough loaded with protein, easy to whip up and enjoy any time.
Complete Cooking Process
-
Ingredient Readiness:
Measure and whisk milk, sugar, and vanilla together until the sugar dissolves; chill the mixture for at least an hour.
-
Flavor Development:
Warm the mixture briefly to bloom the vanilla, then cool; this step deepens the aromatic notes.
-
Texture Control:
Pour into the Ninja Creami container, freeze solid, then spin according to the machine’s vanilla setting.
-
Finishing Touches:
After the spin, fold in a drizzle of vanilla extract or a pinch of sea salt for extra depth.
-
Serving Timing:
Serve immediately for a soft‑serve feel, or refreeze for a firmer scoop.
-
Use a cold container—place the lid in the freezer for 10 minutes before filling.
-
If the ice cream feels too dense, add a splash of milk and re‑spin.
-
Top with toasted almond slices for a gentle crunch.
Pro Tips
I’ve learned that a little patience is the secret—let the mixture rest, then trust the machine. When you hear the gentle hum of the Ninja Creami, imagine the vanilla beans whispering their sweet story into the batter. The result is a dessert that feels like a quiet hug, perfect for sharing with family or savoring alone on a warm afternoon.
 Homestyle & Traditional Recipes
Garlic Steak Bites and Potatoes Recipe
A warm, easy dinner of garlicky steak bites and crispy roasted potatoes.

The essence of the dish:
Silky, buttery vanilla ice cream that melts slowly on the tongue, releasing fragrant notes of real vanilla bean.
A fun fact or historical angle:
The first documented vanilla ice cream in America dates back to 1850, served at a New York hotel for an elegant evening.
Flavor or sensory focus:
You’ll notice the subtle sweetness, the smooth creaminess, and the lingering warmth of vanilla that feels like a gentle breeze.
You Must Know
-
Freeze the mixture solid before loading
-
Use the ‘Vanilla’ setting on the Ninja Creami
-
Shake gently after the spin for extra fluffiness
Frequently Asked Questions
→ Can I use low‑fat milk?
You can, but the ice cream will be less creamy; adding a bit of cream or coconut milk helps retain richness.
→ How long can I store the ice cream?
Keep it in an airtight container for up to two weeks; for best texture, let it soften for 10 minutes before serving.
→ Do I need to add extra sugar?
The recipe’s sugar level is balanced; taste the mixture before freezing if you prefer it sweeter.
→ Can I add mix‑ins?
Yes—fold in crushed cookies, chocolate chips, or fruit after the spin for added texture.
→ Is the Ninja Creami safe for dairy‑free versions?
Absolutely; substitute whole milk with almond or oat milk and follow the same steps.
→ What if the ice cream is too hard after freezing?
Let it sit at room temperature for a few minutes, or briefly re‑spin with a splash of milk.
Nutrition Facts
per serving
210
Calories
3g
Protein
22g
Carbs
11g
Fat
Taste Profile
A classic sweet vanilla flavor with creamy richness
Ingredient Substitutions
Don't have an ingredient? Try these alternatives
Use a higher‑fat plant milk to keep the texture rich.
Adds a faint coconut aroma; adjust sugar slightly.
Recipe Variations
Try these delicious twists on the original
Spicy Version
Add a pinch of cayenne and a drizzle of honey for a subtle heat.
Mediterranean Style
Fold in toasted pistachios and a swirl of honey‑rose syrup.
Common Mistakes to Avoid
Learn from others' mistakes for perfect results
- Not chilling the mixture long enough, leading to icy texture.
- Over‑spinning, which can make the ice cream buttery.
- Using low‑fat milk only, resulting in a watery finish.
Meal Prep & Storage
Make Ahead Tips
You can churn the ice cream and freeze it up to two days ahead; simply let it soften before serving.
Leftover Ideas
Scoops can be reheated gently in a skillet with a splash of milk to create a soft‑serve dessert.
Perfect Pairings
Serve this with...
Cooking Timeline
Combine milk, cream, sugar, and vanilla; stir over low heat.
Remove from heat, steep, and discard vanilla pod.
Cool to room temperature, then refrigerate.
Freeze mixture in Ninja Creami pint container.
Spin in Ninja Creami, fold in optional add‑ins.

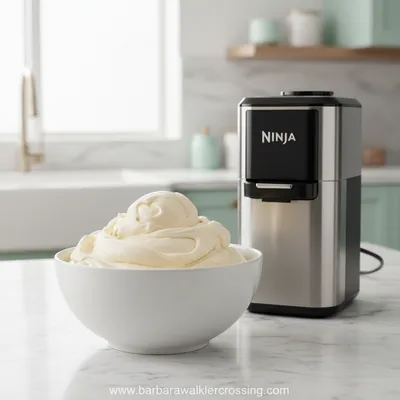
Vanilla Ice Cream – Ninja Creami Recipe
Silky vanilla ice cream made in the Ninja Creami—simple, creamy, and perfect for a cool treat any time of year.
Timing
Prep Time
15 Minutes
Cook Time
0 Minutes
Total Time
20 Minutes + 1 Hour Freeze
Recipe Details
Ingredients
Base
-
01
2 cups whole milk
-
02
1 cup heavy cream (optional)
-
03
3/4 cup granulated sugar
-
04
1 vanilla bean, split and seeded
-
05
1 pinch sea salt
Optional Add‑Ins
-
01
1 tsp vanilla extract
-
02
Zest of 1/2 lemon
-
03
Toasted almond slices
Instructions
In a saucepan, combine milk, cream (if using), sugar, vanilla seeds and the pod; warm over low heat just until the sugar dissolves, stirring gently.
Remove from heat, let the mixture steep for 10 minutes, then discard the pod and stir in a pinch of sea salt and optional vanilla extract.
Cool the mixture to room temperature, then cover and chill in the refrigerator for at least one hour.
Pour the chilled mixture into the Ninja Creami pint container, secure the lid, and freeze solid (about 24 hours).
Place the frozen pint into the Ninja Creami, select the ‘Vanilla Ice Cream’ setting, and spin. If the texture is too crumbly, add a splash of milk and re‑spin.
Transfer the creamy ice cream to a serving bowl, fold in any optional add‑ins, and enjoy immediately or refreeze for firmer scoops.
Notes & Tips
-
1
For an extra vanilla boost, simmer the vanilla pod in the milk for a few minutes before straining.
-
2
If you prefer a softer texture, add 2 tbsp of milk after the spin and give it a quick stir.
-
3
Keep the container lid tightly sealed to prevent ice crystals from forming.
Tools You'll Need
-
Ninja Creami machine
-
Saucepan
-
Whisk
-
Measuring cups and spoons
-
Sharp knife for vanilla bean
-
Freezer‑safe pint container
Must-Know Tips
-
Freeze the container completely; a partially frozen base leads to grainy texture.
-
Use high‑quality vanilla beans for the most aromatic flavor.
-
Taste before freezing; adjust sweetness now rather than after.
Professional Secrets
-
Warm the milk just enough to dissolve sugar, preserving the vanilla’s delicate notes.
-
Stir gently to avoid incorporating air bubbles that affect smoothness.
-
Let the mixture rest after heating; this allows the vanilla flavor to fully develop.

Recipe by
Isabella MooreCelebrating life with flavor 🎉🍽️ Creating magical seasonal dishes full of warmth, joy, and delicious taste ✨
Get Delicious Recipes Weekly
Join 25,000+ home cooks getting our best recipes straight to their inbox.
Free forever • No spam • Unsubscribe anytime