
The concept of a quick, protein‑packed brownie traces back to early health‑food bakers who sought to blend indulgence with nutrition. By using gluten‑free flour and plant‑based protein, this treat offers a modern twist on classic comfort desserts, preserving the familiar richness while meeting today’s dietary preferences.
Why You'll Love It
-
- Ready in two minutes, perfect for busy days
-
- Gluten‑free, gentle on the stomach
-
- Protein‑rich for post‑workout recovery
-
- No added sugars, only natural sweetness
"I never thought a brownie could be this quick and still feel so satisfying!"
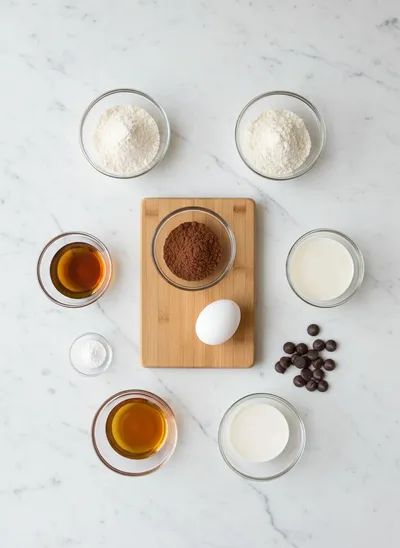
Essential Ingredient Guide
- Almond flour: Provides a tender crumb and a subtle nutty aroma; choose finely ground for a smoother texture.
- Whey protein isolate: Boosts protein without altering flavor; sift to avoid clumps.
- Cocoa powder: Dark cocoa adds depth; use unsweetened for balanced bitterness.
- Maple syrup: A natural sweetener that blends well; adjust to taste.
- Greek yogurt: Adds moisture and a hint of tang; keep it at room temperature.
- Sea salt: A pinch accentuates chocolate flavors; don’t overdo.


Complete Cooking Process
-
Ingredient Readiness:
Measure dry ingredients into a bowl, whisk together to ensure even distribution before adding wet components.
-
Flavor Development:
Mix cocoa, protein, and maple syrup; the scent of cocoa becomes apparent as the batter forms.
-
Texture Control:
Gently fold in Greek yogurt; this step prevents over‑mixing, keeping the brownie tender.
-
Finishing Touches:
Sprinkle a tiny pinch of sea salt on top before microwaving for a subtle flavor lift.
-
Serving Timing:
Let the brownie rest a minute after cooking; it continues to set and the aroma settles.
-
Use a microwave‑safe mug for even heat distribution.
-
If you like extra fluff, add a dash of baking powder.
-
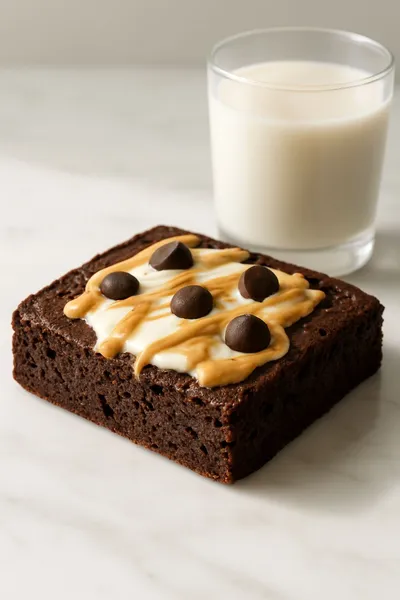
Top with a dollop of almond butter for richness.
-
Pair with a cold glass of almond milk for balance.
Pro Tips
Well, those little adjustments can turn a simple mug treat into something that feels a bit more special. I mean, sometimes the tiniest details make the biggest difference, especially when you’re craving that chocolate comfort.
 Baking, Bread & Sweet Comforts
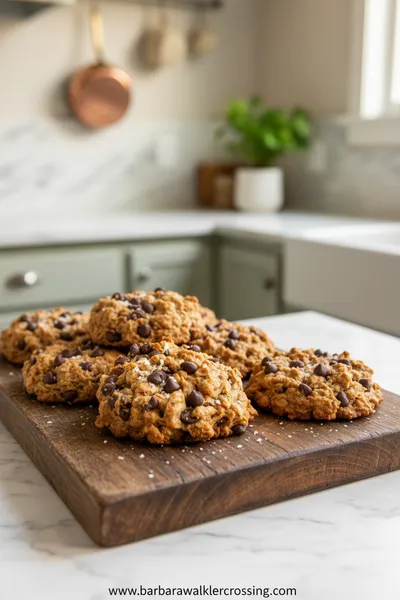
High Protein Cookie Dough
Nutritious cookie dough loaded with protein, easy to whip up and enjoy any time.
The essence of the dish:
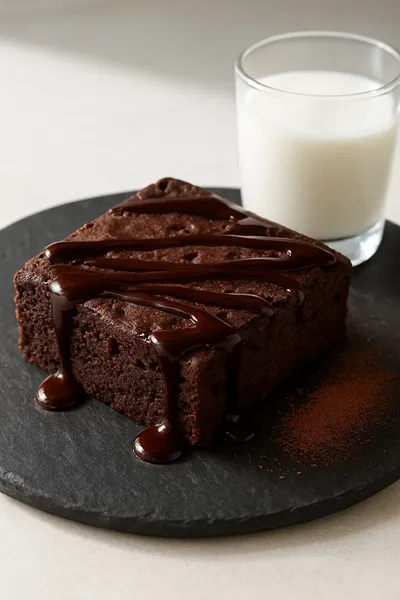
A velvety brownie that packs protein, stays gluten‑free, and comes together in the time it takes to brew a cup of tea.
A fun fact or historical angle:
During the 1970s, fitness enthusiasts began experimenting with protein powders in baked goods, paving the way for today’s high‑protein desserts.
Flavor or sensory focus:
Expect a rich cocoa scent, a slightly fudgy interior, and a gentle sweetness that lingers on the palate.
You Must Know
-
Use a microwave of at least 800 W for proper rise.
-
Do not overcook; the brownie continues cooking after removal.
-
Adjust sweetness with extra maple syrup if desired.
Frequently Asked Questions
→ Can I use plant‑based protein?
Absolutely, pea or soy protein works well; just ensure it’s unflavored.
→ Is this recipe truly gluten‑free?
Yes, we use almond flour and cocoa powder, both naturally gluten‑free.
→ How do I store leftovers?
Place in an airtight container in the fridge for up to three days; reheat briefly.
→ Can I add nuts or chips?
Sure, a handful of chopped walnuts or sugar‑free chocolate chips adds texture.
→ What if I don’t have Greek yogurt?
Replace with the same amount of unsweetened applesauce for moisture.
→ Is this suitable for kids?
Yes, the natural sweeteners keep it kid‑friendly while providing protein.
Nutrition Facts
per serving
210
Calories
12g
Protein
18g
Carbs
11g
Fat
Taste Profile
Rich chocolate with a gentle sweet finish
Ingredient Substitutions
Don't have an ingredient? Try these alternatives
Provides a plant‑based alternative; may affect texture slightly.
Adds a hint of coconut flavor; choose unsweetened varieties.
Recipe Variations
Try these delicious twists on the original
Spicy Version
Add a pinch of cayenne pepper and a drizzle of hot chocolate sauce for a subtle kick.
Mediterranean Style
Stir in chopped pistachios and a dash of orange zest for a bright twist.
Common Mistakes to Avoid
Learn from others' mistakes for perfect results
- Overcooking the brownie, which makes it dry and rubbery.
- Using a too‑small mug causing overflow.
- Skipping the rest period, leading to a less set interior.
Meal Prep & Storage
Make Ahead Tips
You can whisk the dry ingredients together and store in an airtight jar for up to a week; add wet ingredients just before cooking.
Leftover Ideas
Reheat gently in the microwave at 50% power for 20‑30 seconds, or enjoy cold for a chewy texture.
Perfect Pairings
Serve this with...
Cooking Timeline
Gather and measure all ingredients; whisk dry components.
Add wet ingredients and stir to a smooth batter.
Microwave the batter for 90 seconds, watching for firmness.
Let the brownie rest, then add optional toppings.
Enjoy warm; reflect on the simple pleasure of a quick treat.
Two-Minute Protein Brownie – Gluten-Free Single Serve
A quick, gluten‑free protein brownie that feels like a single‑serve hug. In just two minutes you get a fudgy, chocolatey bite that satisfies cravings while keeping the nutrition in check. Perfect for a quiet afternoon or a post‑walk treat.
Timing
Prep Time
2 Minutes
Cook Time
2 Minutes
Total Time
4 Minutes
Recipe Details
Ingredients
Main Ingredients
-
01
1/4 cup almond flour
-
02
2 tbsp whey protein isolate
-
03
1 tbsp unsweetened cocoa powder
-
04
2 tbsp maple syrup
-
05
2 tbsp Greek yogurt
-
06
Pinch of sea salt
Optional Toppings
-
01
A drizzle of almond butter
-
02
A sprinkle of chopped walnuts
Instructions
In a microwave‑safe mug, whisk together almond flour, protein powder, cocoa powder, and sea salt until evenly combined.
Add maple syrup and Greek yogurt; stir until a smooth batter forms, noticing the sweet aroma as the mixture thickens.
Microwave on high for 90 seconds. Look for a firm top but a slightly soft center; the scent of chocolate fills the kitchen.
Let the brownie rest for one minute, then top with almond butter or walnuts if desired.
Enjoy warm, perhaps alongside a cup of tea, and remember to savor each bite.
Notes & Tips
-
1
If the brownie looks too wet after microwaving, add an extra 10‑second burst.
-
2
For extra fluff, stir in 1/4 tsp baking powder before cooking.
-
3
Feel free to swap maple syrup with honey for a different sweet note.
Tools You'll Need
-
Microwave‑safe mug
-
Measuring spoons
-
Small whisk or fork
-
Microwave
Must-Know Tips
-
Don’t overcook; the brownie will keep cooking after removal.
-
Use a mug with high sides to avoid overflow.
-
Taste the batter before cooking to adjust sweetness.
Professional Secrets
-
Room temperature yogurt mixes more evenly.
-
Sift dry ingredients to prevent lumps.
-
A pinch of salt amplifies chocolate flavor.

Recipe by
Barbara WalkerCooking with heart and heritage 🥘❤️ Sharing nostalgic flavors, family comfort, and timeless kitchen love ✨
Get Delicious Recipes Weekly
Join 25,000+ home cooks getting our best recipes straight to their inbox.
Free forever • No spam • Unsubscribe anytime