
Red velvet, originally a Southern staple, emerged during the Great Depression when cocoa was scarce and beet juice provided the signature hue. By the mid‑20th century, the soft cake evolved into a cookie form, prized for its delicate crumb and comforting flavor. This sweet tradition continues today, offering a gentle respite from the bustle of daily life.
Why You'll Love It
-
- Soft, chewy texture that melts in your mouth
-
- Subtle cocoa flavor balanced with a hint of vanilla
-
- Eye‑catching red hue without artificial dyes
-
- Easy to bake in any standard kitchen
“These cookies are pure comfort – tender, rich, and beautifully colored.”
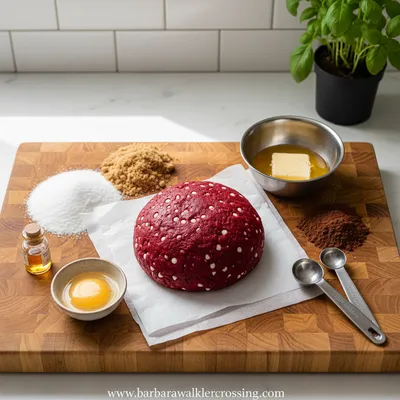
Essential Ingredient Guide
- All‑purpose flour: Provides structure; sift to keep the crumb light.
- Cocoa powder: A small amount offers depth without overwhelming the red tone.
- Beet powder (optional): Enhances natural red color while adding a gentle earthiness.
- Vanilla extract: Adds warmth and rounds out the sweet profile.
- Buttermilk: Tenderizes the dough and gives a slight tang that balances sweetness.
- Brown sugar: Creates moisture and a caramel‑like richness.

Complete Cooking Process
-
Ingredient Readiness:
Measure and sift dry ingredients; bring butter to room temperature so it creams smoothly.
-
Flavor Development:
Cream butter and sugars, then slowly incorporate cocoa and beet powder for a uniform hue.
-
Texture Control:
Fold in flour gently; over‑mixing can lead to tough cookies.
-
Finishing Touches:
Shape cookies, sprinkle a pinch of sea salt, and bake until the edges just set.
-
Serving Timing:
Allow cookies to cool on the sheet for a minute, then transfer to a rack – they finish setting as they cool.
-
Chill the dough for at least 30 minutes to prevent spreading.
-
Use a light hand when rolling; a gentle patting works best.
-
Bake on the middle rack for even heat distribution.
-
Store in an airtight container with a slice of bread to retain softness.
Pro Tips
These little adjustments make a huge difference. I remember once forgetting to chill, and the cookies spread into thin wafers – not the result I was looking for. So, take a moment to let the dough rest; you’ll thank yourself when you pull a perfectly rounded cookie from the oven. Also, a slice of fresh bread in the container keeps them soft for days, a trick I’ve used for years.
 Baking, Bread & Sweet Comforts
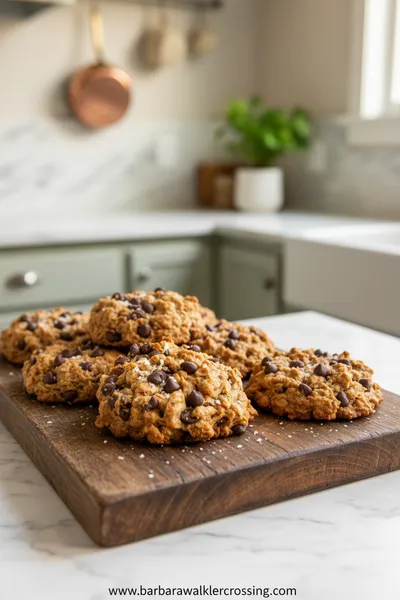
High Protein Cookie Dough
Nutritious cookie dough loaded with protein, easy to whip up and enjoy any time.
The essence of the dish:
A balance of cocoa, vanilla, and a whisper of beet creates a tender crumb that feels almost melt‑in‑your‑mouth, while the subtle red tint adds visual warmth.
A fun fact or historical angle:
During the 1940s, red velvet cake became a holiday favorite, and the cookie version followed as bakers sought a portable bite of that elegance.
Flavor or sensory focus:
The first bite releases gentle cocoa notes, followed by a buttery sweetness, and ends with a soft, slightly chewy finish.
You Must Know
-
Do not over‑mix the dough.
-
Chill before baking.
-
Watch the edges; they should just start to turn golden.
Frequently Asked Questions
→ Can I use whole‑wheat flour?
Yes, substitute up to 50% of the all‑purpose flour; the cookies will be slightly denser but still tender.
→ How do I make them gluten‑free?
Replace the flour with a 1‑to‑1 gluten‑free blend and ensure your cocoa powder is also gluten‑free.
→ What if I don’t have beet powder?
A few drops of natural red food coloring or a tiny pinch of beet juice will give the color without affecting flavor.
→ Can I add frosting?
A light cream cheese drizzle works beautifully; just let the cookies cool completely first.
→ How long do they keep fresh?
Stored in an airtight container, they stay soft for up to a week; add a slice of bread to prolong moisture.
→ Do these cookies freeze well?
Yes, freeze baked and cooled cookies in a zip‑lock bag; thaw at room temperature before serving.
Nutrition Facts
per serving
180
Calories
2g
Protein
24g
Carbs
8g
Fat
Taste Profile
A gentle sweetness balanced by cocoa depth
Ingredient Substitutions
Don't have an ingredient? Try these alternatives
Use up to 50% whole‑wheat for a nuttier flavor; may affect crumb softness.
Provides a subtle coconut aroma; solidifies faster, so chill dough longer.
Recipe Variations
Try these delicious twists on the original
Spicy Version
Add 1/2 tsp cinnamon and a pinch of cayenne for a warm kick.
Mediterranean Style
Fold in crumbled feta and chopped pistachios for a savory contrast.
Common Mistakes to Avoid
Learn from others' mistakes for perfect results
- Over‑mixing the dough, leading to tough cookies.
- Baking too long, causing dry edges.
- Skipping the chill step, resulting in flat cookies.
Meal Prep & Storage
Make Ahead Tips
You can mix the dry ingredients and store them in an airtight container for up to 2 weeks; keep the wet mix refrigerated for 24 hours before baking.
Leftover Ideas
Reheat gently in a warm oven at 300°F for 5 minutes to restore softness.
Perfect Pairings
Serve this with...
Cooking Timeline
Gather and measure all ingredients; preheat the oven.
Cream butter and sugars, then add eggs and liquids.
Combine wet and dry mixtures; add coloring.
Chill dough, then scoop onto sheets.
Bake cookies, then cool on rack.
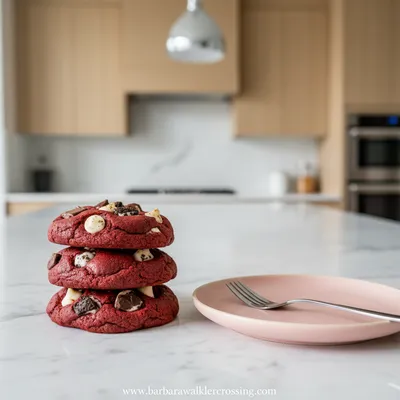
Red Velvet Cookies – Classic Sweet Treat
These soft, chewy red velvet cookies offer a gentle cocoa whisper wrapped in a velvety crumb. I remember when my grandmother first handed me a batch, the scent of cocoa and a faint hint of vanilla filling the kitchen. Honestly, the texture is just right – not too dense, not too airy, and the subtle red hue invites a quiet smile. For a hint of extra sweetness, you might compare them to the classic sugar cookies that many bake for celebrations.
Timing
Prep Time
20 Minutes
Cook Time
12 Minutes
Total Time
32 Minutes
Recipe Details
Ingredients
Dry Mix
-
01
2 1/2 cups all‑purpose flour
-
02
2 tbsp cocoa powder
-
03
1 tsp beet powder (optional)
-
04
1 tsp baking soda
-
05
1/2 tsp salt
Wet Mix
-
01
1 cup unsalted butter, softened
-
02
1 cup brown sugar, packed
-
03
1/2 cup granulated sugar
-
04
2 large eggs
-
05
2 tsp vanilla extract
-
06
1/2 cup buttermilk
Finishing
-
01
1 tbsp red food coloring (if needed)
-
02
Sea salt flakes for sprinkling
Instructions
Preheat the oven to 350°F (175°C) and line baking sheets with parchment paper.
In a bowl whisk together flour, cocoa, beet powder, baking soda, and salt; set aside.
Cream butter, brown sugar, and granulated sugar until light and fluffy; this can take about 3–4 minutes.
Add eggs one at a time, then stir in vanilla and buttermilk; mix until just combined.
Gradually fold the dry ingredients into the wet mixture; stir in red food coloring if the dough isn’t deep enough.
Chill the dough for 30 minutes, then scoop rounded teaspoons onto the prepared sheets, sprinkle lightly with sea salt, and bake 10‑12 minutes until the edges are set.
Notes & Tips
-
1
If you prefer more protein, try adding a scoop of protein cookies mix to the batter.
-
2
For a lower‑sugar version, reduce granulated sugar by half and increase brown sugar slightly.
-
3
A dash of espresso powder can intensify the cocoa flavor without adding bitterness.
Tools You'll Need
-
Mixing bowls
-
Hand mixer or stand mixer
-
Spatula
-
Measuring cups and spoons
-
Baking sheets
-
Parchment paper
Must-Know Tips
-
Don't overcrowd the pan, Cook in batches to keep shape.
-
Let cookies rest on the sheet briefly, Allows carry‑over cooking.
-
Taste as you go, Adjust seasoning if needed.
Professional Secrets
-
Room temperature butter, Ensures smooth creaming.
-
Chill dough, Prevents excess spreading.
-
Use parchment paper, Guarantees even browning.

Recipe by
Barbara WalkerCooking with heart and heritage 🥘❤️ Sharing nostalgic flavors, family comfort, and timeless kitchen love ✨
Get Delicious Recipes Weekly
Join 25,000+ home cooks getting our best recipes straight to their inbox.
Free forever • No spam • Unsubscribe anytime