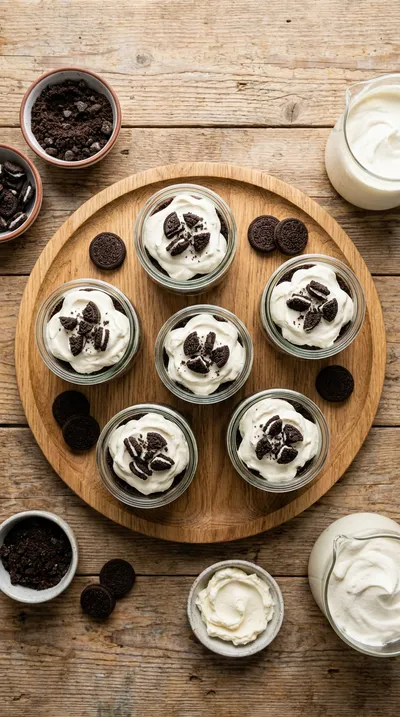
The art of the no-bake dessert rose to prominence as home cooks sought ways to bring the elegance of a traditional cheesecake into the warmer months. While the classic baked cheesecake hails from the depths of European tradition, the refrigerated version is a modern celebration of convenience and texture. These oreo no-bake cheesecake cups are a playful evolution of that concept, replacing a standard graham cracker base with the bold, chocolatey profile of a beloved American cookie.
Culturally, the transition to individual portions reflects a shift toward mindful indulgence and shared experiences. By utilizing a muffin tin and cupcake liners, the dessert becomes a personal treat rather than a daunting slice of a giant cake. This approach preserves the integrity of the layers, ensuring that every guest receives the perfect ratio of buttery crust to creamy filling.
At the heart of this treat is the chemistry of stabilization. By folding whipped cream into a base of softened cream cheese, the dessert achieves a structural lightness that doesn't require the heat of an oven to set. It is a testament to how simple ingredients can be transformed through temperature and texture, turning a few pantry staples into a sophisticated, chilled masterpiece.
Why You'll Love It
-
- Honestly, it's just such a relief not to turn on the oven when the kitchen is already warm, and these little cups are so refreshing.
-
- I remember when I first made these, the kids just loved how the creamy filling melted against that chocolatey Oreo cookie crumbs base.
-
- Look, it's a bit indulgent, yeah, but the way the cold heavy cream makes it airy and light is just wonderful.
-
- They're just so darling in those individual liners, making it feel like a fancy party treat without all the stress.
"Honestly, I can't believe there's no baking involved! My grandkids absolutely love these little cups, and I love how easy they are to prep."
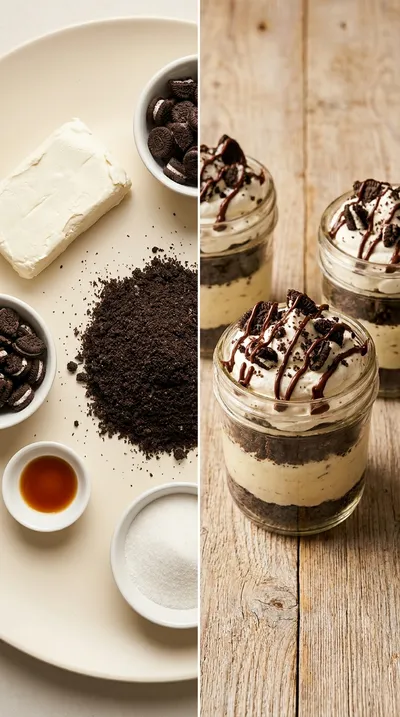
Essential Ingredient Guide
- 8 ounces (227g) cream cheese, softened to room temperature: This is the heart of the treat. Well, make sure it's truly soft, otherwise you'll get those little lumps and it's just not as smooth.
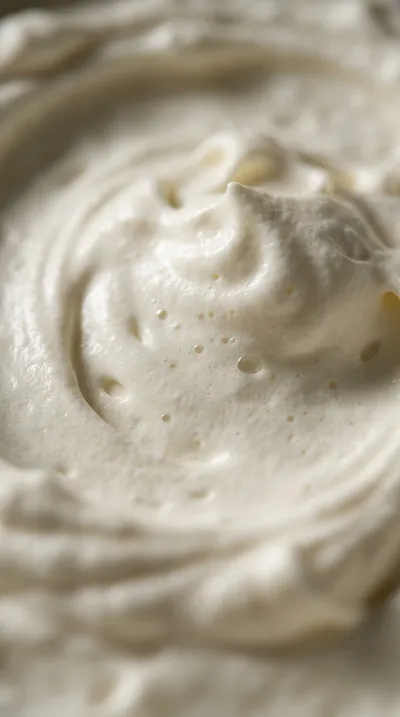
- 1 cup (237ml) heavy cream, cold: Keeping this chilled is the secret. When you whip it up, it gives the cheesecake that dreamy, cloud-like lift we're after.
- ½ cup (60g) mini Oreo pieces, for garnish: These are just for a bit of a crunch on top. It makes the cups look so polished, and, ugh, they just taste so good.
- 1 teaspoon vanilla extract: Just a tiny bit, but it rounds out the sweetness. It adds that warm, homey scent that ties everything together.
- 6 tablespoons (85g) unsalted butter, melted: This binds the crumbs together. I find melting it gently is best so it soaks right into the cookies for a sturdy crust.
- 1 cup (200g) granulated sugar: This gives us that classic sweetness. I mean, it's a treat, so we want it sweet, but it balances the tang of the cheese perfectly.
 Homestyle & Traditional Recipes
Garlic Steak Bites and Potatoes Recipe
A warm, easy dinner of garlicky steak bites and crispy roasted potatoes.
Complete Cooking Process
-
Getting Ready:
Start by letting your 8 ounces (227g) cream cheese, softened to room temperature, sit out for a while. It's so important for a smooth texture, and trust me, it's worth the wait.
-
Building the Base:
The flavor really starts with the crust. Mixing 1 ½ cups (180g) Oreo cookie crumbs with that melted butter creates a rich, chocolatey foundation that's just delightful.
-
Creating the Airiness:
The magic happens when you whip the 1 cup (237ml) heavy, cold cream to stiff peaks. Gently folding it into the cheese mixture keeps it light instead of dense.
-
The Final Flourish:
Right before you serve them, sprinkle those ½ cup (60g) mini Oreo pieces on top. It's a simple touch, but it adds a lovely little snap to the creamy topping.
-
Patience in the Fridge:
These need a good long nap in the refrigerator for at least 4 hours. It's the only way to make sure they're set and perfectly chilled.
-
Leave your cream cheese out for at least an hour to avoid any lumps in your filling.
-
Be careful not to over-whip your heavy cream, or it might get a bit too stiff.
-
Fold the whipped cream in gently in two additions so you don't deflate all that lovely air.
-
For a real treat, pulse a few extra Oreos into the cheese mixture for an even deeper chocolate flavor.
Pro Tips
You've got this, just take your time and enjoy the process!
Better For You Treats
Ways to Make it Your Own
Serving Suggestions
Frequently Asked Questions
→ Can I make these ahead of time?
Oh, absolutely! In fact, I prefer making them overnight so they have plenty of time to set in the fridge.
→ What if my filling isn't stiff enough?
Just make sure your heavy cream was very cold before whipping and that you didn't over-mix while folding. If they're still soft, give them a few more hours of chilling.
→ Can I freeze these for later?
Yes, you can! Just wrap them individually in plastic wrap and pop them in a freezer bag for up to 2 weeks, then thaw in the fridge.
Nutrition Facts
per serving
380
Calories
6g
Protein
32g
Carbs
24g
Fat
Taste Profile
A rich, creamy, and deeply sweet chocolate-vanilla blend.
Ingredient Substitutions
Don't have an ingredient? Try these alternatives
A good dairy-free alternative for the crust base.
Ensures a slightly smoother texture if you're worried about graininess.
Recipe Variations
Try these delicious twists on the original
Chocolate Oreo Cheesecake Cups
For a richer chocolate experience, simply add 2 tablespoons of unsweetened cocoa powder to the cream cheese mixture.
Peanut Butter Oreo Cheesecake Cups
Stir in 2 tablespoons of peanut butter to the cream cheese mixture and finish with a sprinkle of chopped peanuts on top.
Common Mistakes to Avoid
Learn from others' mistakes for perfect results
- Using cold cream cheese which leads to a lumpy filling.
- Over-whipping the heavy cream into butter.
- Over-mixing the final batter, which removes the airy fluffiness.
Meal Prep & Storage
Make Ahead Tips
These are actually meant to be made ahead! They need at least 4 hours to set, so making them the night before is the best way to go.
Leftover Ideas
Store any remaining cups in the fridge. If you froze them, just let them thaw in the refrigerator before you enjoy them.
Perfect Pairings
Serve this with...
Cooking Timeline
Crush Oreos and mix with melted butter.
Press crust into the muffin tin liners.
Beat cream cheese and sugar, then whip the heavy cream.
Fold ingredients together and fill the crusts.
Refrigerate until completely set before garnishing.

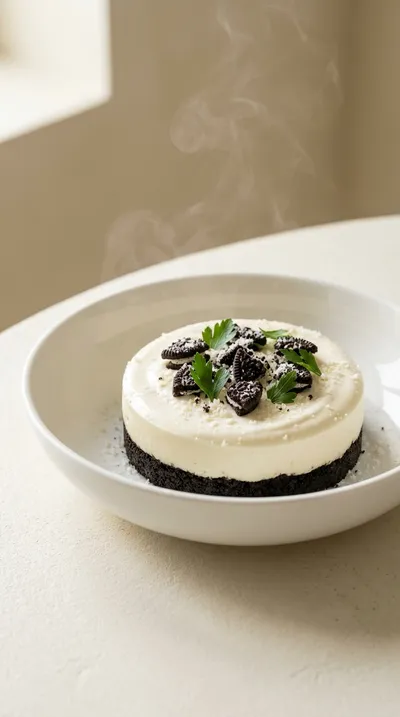
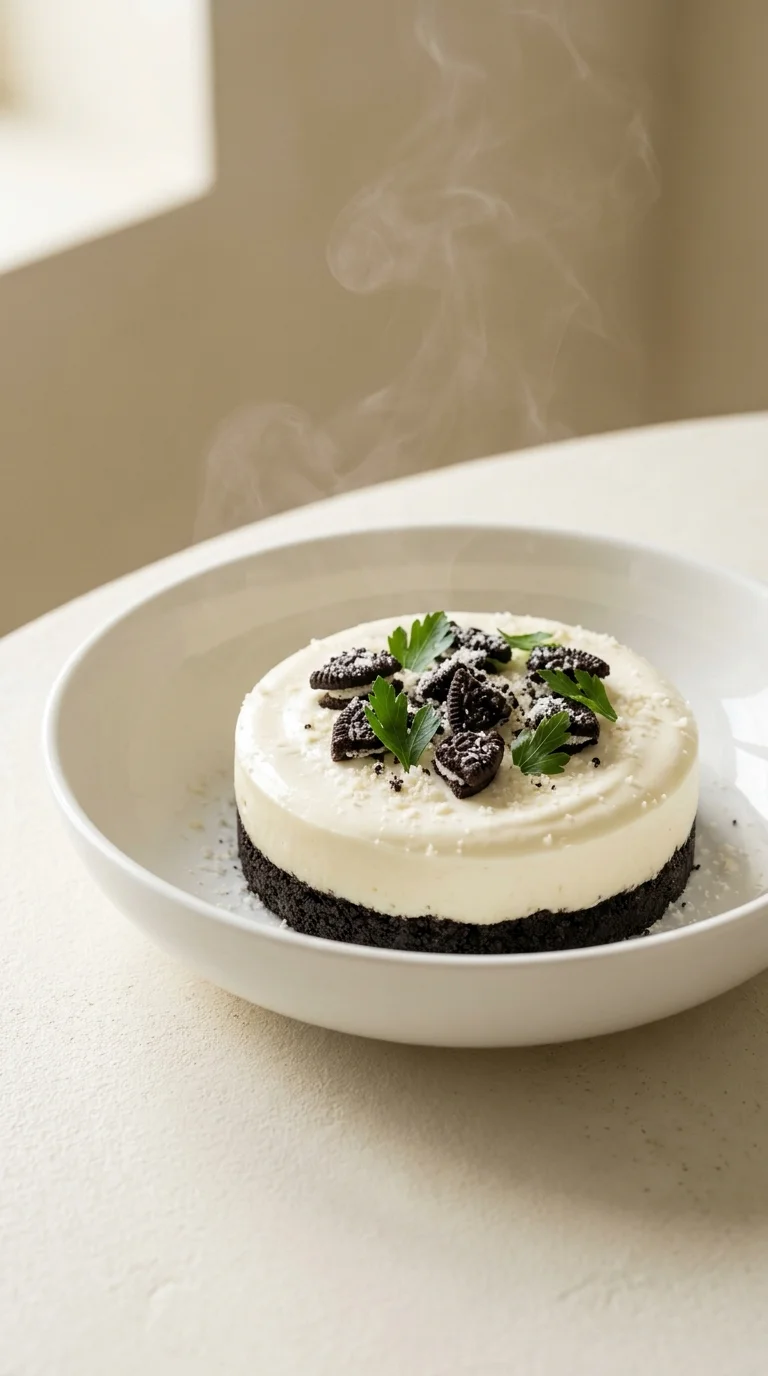
Oreo No-Bake Cheesecake Cups
A cool, creamy escape in every single bite. These oreo no-bake cheesecake cups blend a rich, buttery cookie crust with a cloud-like filling that just melts on your tongue.
Timing
Prep Time
20 Minutes
Cook Time
0 Minutes
Total Time
20 Minutes
Recipe Details
Ingredients
The Crust
-
01
1 ½ cups (180g) Oreo cookie crumbs (about 30 Oreos, finely crushed)
-
02
6 tablespoons (85g) unsalted butter, melted
Cheesecake Filling
-
01
8 ounces (227g) cream cheese, softened to room temperature
-
02
1 cup (200g) granulated sugar
-
03
1 teaspoon vanilla extract
-
04
1 cup (237ml) heavy cream, cold
Garnish
-
01
½ cup (60g) mini Oreo pieces, for garnish
Instructions
Start with your crust. In a medium bowl, stir together those 1 ½ cups (180g) Oreo cookie crumbs and the 6 tablespoons (85g) unsalted butter, melted. Just mix it well until the crumbs are evenly moistened... it should feel just like wet sand in your hands, honestly.
Now, go ahead and line a 12-cup muffin tin with your cupcake liners. Take about 2-3 tablespoons of that Oreo crumb mixture and press it firmly into the bottom of each liner. You want a nice, compact crust so they don't crumble too much later.
For the filling, grab a large bowl and beat the 8 ounces (227g) cream cheese, softened to room temperature, with your mixer on medium. Once it's smooth and creamy, gradually add in the 1 cup (200g) granulated sugar and keep beating until it's all fluffy. Wow, it smells wonderful at this stage.
Stir in the 1 teaspoon vanilla extract until it's evenly distributed throughout the mixture.
In a separate chilled bowl, whip your 1 cup (237ml) heavy cream, cold, on medium-high speed. You're looking for stiff peaks here, but be careful—don't over-whip it or you'll have a bit of a mess, oops!
Now, the gentle part. Gently fold the whipped cream into the cream cheese mixture in two additions. Use your spatula and be careful not to deflate all that lovely air. It's okay if you see a few streaks of whipped cream; that's just fine.
Spoon or pipe that cheesecake filling evenly over your Oreo crusts in the cupcake liners, filling them all the way to the top.
Cover your muffin tin with some plastic wrap and tuck them away in the refrigerator. They need at least 4 hours, but honestly, leaving them overnight is much better to let them set completely.
Just before you're ready to serve, sprinkle those ½ cup (60g) mini Oreo pieces over the top of each cup for a little bit of crunch.
Notes & Tips
-
1
Ensure the cream cheese is fully softened to avoid any stubborn lumps.
-
2
Be gentle when folding the whipped cream to maintain the airy texture.
-
3
Chill the heavy cream and the bowl for the best whipping results.
Tools You'll Need
-
Medium and large mixing bowls for combining ingredients
-
Electric mixer (handheld or stand) for whipping the cream and cream cheese
-
Measuring cups and spoons for precision
-
Rubber spatula for gentle folding
-
12 individual cupcake liners to hold the treats
-
12-cup Muffin tin for stability
-
Food processor or zip-top bag and rolling pin for crushing the Oreos
Must-Know Tips
-
Softened Cream Cheese, Leave it out for at least an hour so your filling is perfectly smooth.
-
Avoid Overmixing, Don't over-work the whipped cream into the cheese or you'll lose that light, airy feel.
-
Intense Flavor, Pulse a few extra Oreos into the cheese mixture for a deeper chocolate taste.
Professional Secrets
-
Use a chilled bowl when whipping heavy cream to ensure the fastest and most stable peaks.
-
Fold in two additions rather than all at once to preserve the aeration of the filling.
-
Press the crust firmly to create a structural base that supports the creamy filling.

Recipe by
Isabella MooreCelebrating life with flavor 🎉🍽️ Creating magical seasonal dishes full of warmth, joy, and delicious taste ✨
Get Delicious Recipes Weekly
Join 25,000+ home cooks getting our best recipes straight to their inbox.
Free forever • No spam • Unsubscribe anytime