
The concept of frozen desserts without an ice cream maker dates back to early 20th‑century home cooks, who used simple hand‑whisking techniques to achieve a smooth frozen treat. This method spreads across cultures, from Italian gelato to Indian kulfi, showing how a few basic ingredients can create a beloved dessert.
Why You'll Love It
-
- No need for an ice cream maker, just a bowl and whisk
-
- Ready in under an hour, perfect for spontaneous cravings
-
- Gentle sweetness that lets the vanilla shine
-
- Creamy texture without any heavy cream
"The easiest ice cream I've ever made—no churn, just pure joy!"
Essential Ingredient Guide
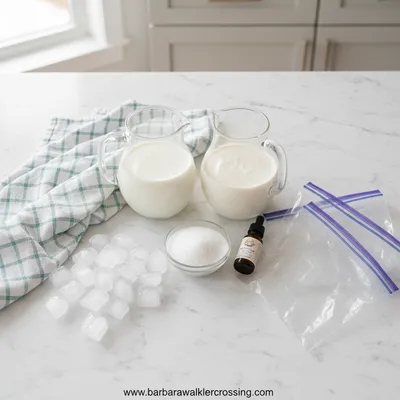
- Whole milk: Choose fresh, full‑fat milk for richness; avoid ultra‑pasteurized if possible.
- Granulated sugar: Adjust to taste; finer sugar dissolves more quickly.
- Pure vanilla extract: A splash adds aromatic depth; you can substitute vanilla bean paste.
- A pinch of salt: Enhances the sweet flavors and balances the palate.
- Lemon juice (optional): A tiny dash brightens the flavor and helps keep the mixture smooth.
- Maple syrup (optional sweetener): Adds a subtle caramel note; use sparingly.
Complete Cooking Process
-
Ingredient Readiness:
Measure milk, sugar, and vanilla; whisk until the sugar begins to dissolve.
-
Flavor Development:
Let the mixture sit for a few minutes; the vanilla aromas meld.
-
Texture Control:
Freeze the bowl, stirring every 10‑15 minutes to break ice crystals.
-
Finishing Touches:
Add a final whisk before serving for that silky mouthfeel.
-
Serving Timing:
Serve within 30 minutes of the final stir for optimal softness.
-
Chill the bowl beforehand for faster setting
-
Use a metal bowl for even cold distribution
-
Stir with a rubber spatula to keep the mixture airy
-
Add a splash of almond milk for a nutty nuance
Pro Tips
I’ve found that these small adjustments make a big difference. The ice cream feels smoother, and the flavor stays bright. It’s the kind of tip that feels like a secret you’ve just discovered while cleaning the kitchen, and it makes the whole experience feel even cozier.

The essence of the dish:
It’s all about the simple harmony of milk, sugar, and vanilla, coaxed into a frost‑kissed cream without any heavy churn.
A fun fact or historical angle:
Before electric freezers, families would stir sweetened milk in a cold cellar, a technique that inspired today’s no‑cook methods.
Flavor or sensory focus:
You’ll first notice the sweet aroma of vanilla, then the cool, buttery mouthfeel that melts on the tongue.
You Must Know
-
Keep the mixture cold between stirs
-
Stir gently to avoid graininess
-
Serve quickly for best texture
Frequently Asked Questions
→ Can I use dairy‑free milk?
Absolutely—you can substitute almond milk or coconut milk, just be aware the texture may be a bit lighter.
→ Do I need a freezer‑safe bowl?
A metal or glass bowl works best; plastic can become too flexible when frozen.
→ How long can I store the ice cream?
Keep it in an airtight container for up to 3 days; stir before serving if it hardens.
→ Can I add mix‑ins like fruit or nuts?
Yes, fold them in after the final stir, but add only a handful so the ice cream stays smooth.
→ Is it safe for kids with lactose intolerance?
Use lactose‑free milk or a dairy‑free alternative; the process is the same.
→ Why does the ice cream need to be stirred?
Stirring breaks ice crystals, giving the dessert its creamy texture instead of a grainy freeze.
Nutrition Facts
per serving
210
Calories
6g
Protein
30g
Carbs
8g
Fat
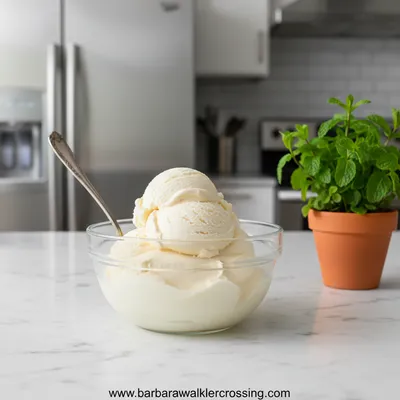
Taste Profile
Creamy vanilla with a gentle sweetness
Ingredient Substitutions
Don't have an ingredient? Try these alternatives
Make sure the plant milk is unsweetened for balance.
Use a bit less honey as it’s sweeter than sugar.
Recipe Variations
Try these delicious twists on the original
Spicy Version
Add a pinch of cayenne and a drizzle of honey for a warming kick.
Mediterranean Style
Stir in finely chopped pistachios and a touch of rosewater for a floral twist.
Common Mistakes to Avoid
Learn from others' mistakes for perfect results
- Skipping the intermittent stirring, which leads to icy texture.
- Using a warm bowl, preventing proper freezing.
- Adding mix‑ins too early, causing them to become soggy.
Meal Prep & Storage
Make Ahead Tips
You can whisk the base and chill it overnight; just give it a quick stir before freezing for the same creamy result.
Leftover Ideas
Transfer leftover ice cream to a sealed container; let it soften at room temperature for a few minutes before scooping.
Perfect Pairings
Serve this with...
Cooking Timeline
Whisk milk, sugar, vanilla, and salt until sugar begins to dissolve.
Place bowl in freezer; stir gently after 10 minutes.
Continue stirring every 10‑15 minutes to keep texture smooth.
Final whisk for a silky finish; serve immediately.

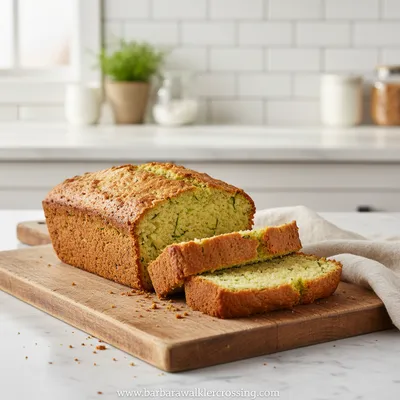
No-Cook Homemade Ice Cream Recipe
Whip up a creamy, dreamy no‑cook homemade ice cream with just a few pantry staples. It’s quick, refreshing, and oh‑so‑satisfying—perfect for those warm afternoons when you crave something sweet without turning on the freezer.
Timing
Prep Time
10 Minutes
Cook Time
0 Minutes
Total Time
70 Minutes
Recipe Details
Ingredients
Base
-
01
2 cups whole milk
-
02
1/2 cup granulated sugar
-
03
2 tsp pure vanilla extract
-
04
1 pinch sea salt
-
05
1 tsp lemon juice (optional)
-
06
1 tbsp maple syrup (optional)
Instructions
In a large bowl, whisk together milk and sugar until the sugar begins to dissolve, about 2 minutes.
Add vanilla extract, salt, and if desired, a splash of lemon juice or maple syrup; whisk gently.
Place the bowl in the freezer. After 10 minutes, pull it out and stir vigorously with a rubber spatula, breaking up any forming ice crystals.
Return the bowl to the freezer and repeat the stirring every 10‑15 minutes for about 45 minutes, until the mixture is thick and creamy.
Give the ice cream one final whisk, then scoop into bowls or cones. Enjoy the cool, buttery texture right away.
Notes & Tips
-
1
If the mixture thickens too quickly, let it sit at room temperature for a minute before the next stir.
-
2
For a richer flavor, substitute half of the milk with heavy cream.
-
3
A pinch of espresso powder can enhance the vanilla without tasting like coffee.
 Baking, Bread & Sweet Comforts
High Protein Cookie Dough
Nutritious cookie dough loaded with protein, easy to whip up and enjoy any time.
Tools You'll Need
-
Large mixing bowl
-
Whisk or electric mixer
-
Rubber spatula
-
Freezer‑safe metal bowl
-
Measuring cups and spoons
Must-Know Tips
-
Don’t skip the intermittent stirring; it prevents icy crystals.
-
Keep the bowl as cold as possible; pre‑chill for best results.
-
Taste the mixture before freezing; adjust sweetness early.
Professional Secrets
-
Use a chilled metal bowl to accelerate freezing.
-
Stir in a figure‑eight motion for even texture.
-
Add a tiny dash of alcohol (optional) to lower freezing point—though we omit it here for simplicity.

Recipe by
Barbara WalkerCooking with heart and heritage 🥘❤️ Sharing nostalgic flavors, family comfort, and timeless kitchen love ✨
Get Delicious Recipes Weekly
Join 25,000+ home cooks getting our best recipes straight to their inbox.
Free forever • No spam • Unsubscribe anytime