
Coffee has traveled across continents and centuries, from ancient Ethiopian beans to modern espresso machines. This recipe captures that journey in a bowl of frozen comfort, marrying the deep, earthy notes of espresso with a protein‑packed cream base. While the history speaks of coffee houses bustling with philosophers, the texture here is quietly modern, offering a nutritious twist that feels both familiar and fresh.
Why You'll Love It
-
- Packed with protein for recovery
-
- Rich espresso flavor without bitterness
-
- Silky texture thanks to the Ninja Creami
-
- Simple ingredients you likely have at home
"The mocha protein ice cream is my new go‑to after a run – creamy, coffee‑kissed, and keeps me full!"
Essential Ingredient Guide
- Unsweetened almond milk: Provides a light base; choose a brand with a mild flavor to let the coffee shine
- Whey protein isolate: Adds a creamy body and boosts protein; stir until fully dissolved to avoid graininess
- Espresso or strong coffee: Use freshly brewed, cooled espresso for the brightest aroma
- Cocoa powder: A teaspoon of Dutch‑process cocoa deepens the mocha depth without overwhelming
- Maple syrup or honey: Just enough sweetness to balance the coffee’s natural bite
- Vanilla extract: A splash adds warmth and rounds the flavor


Complete Cooking Process
-
Ingredient Readiness:
Measure and whisk the almond milk, protein powder, and sweetener together before adding the espresso and cocoa.
-
Flavor Development:
Stir in the cooled espresso and cocoa, letting the aroma fill the kitchen; let the mixture rest briefly for flavors to marry.
-
Texture Control:
Chill the blend thoroughly, then process in the Ninja Creami to achieve a smooth, custard‑like consistency.
-
Finishing Touches:
After the cycle, fold in a tiny drizzle of extra maple syrup if desired, and let the ice cream sit for a few minutes to settle.
-
Serving Timing:
Serve within an hour for the best scoopable texture; the ice cream softens and releases its coffee perfume.
-
Use chilled espresso to avoid warming the mixture
-
Blend protein powder with a little milk first for a lump‑free base
-
Run the Creami’s ‘re‑spin’ if the texture feels a touch icy
-
Top with a dusting of cocoa or a few coffee beans for visual contrast
Pro Tips
I’ve found that a quick re‑spin adds that extra silkiness, especially on humid days when the ice cream can become a bit grainy. Also, keep a small bowl of warm water nearby; a quick dip of the scoop helps glide through the frozen surface without breaking the delicate balance of flavor.
 Baking, Bread & Sweet Comforts
High Protein Cookie Dough
Nutritious cookie dough loaded with protein, easy to whip up and enjoy any time.
The essence of the dish:
It’s the comforting hug of espresso paired with the lightness of a protein‑rich custard, delivering both energy and indulgence in every bite.
A fun fact or historical angle:
Did you know the first recorded use of espresso machines dates back to 1884 in Milan? That same spirit of innovation inspires this frozen treat.
Flavor or sensory focus:
Expect a velvety mouthfeel, a gentle coffee bitterness softened by sweet maple, and a whisper of chocolate that lingers on the palate.
You Must Know
-
Chill the mixture for at least 4 hours
-
Use the Ninja Creami’s ‘Ice Cream’ setting
-
Serve slightly softened for best texture
Frequently Asked Questions
→ Can I use a different protein powder?
Yes, plant‑based or casein powders work; just ensure they dissolve well to keep the texture smooth.
→ Do I need an espresso machine?
A strong brewed coffee works fine; just make it more concentrated than your usual cup.
→ How long can I store the ice cream?
Keep it sealed in the freezer for up to 2 weeks; stir gently before serving if it hardens.
→ Can I add toppings?
Definitely—shaved dark chocolate, toasted almonds, or a drizzle of cold‑brew caramel add extra texture.
→ Is this recipe keto‑friendly?
Yes, as long as you choose a low‑carb sweetener and keep the cocoa unsweetened.
→ What’s the best way to soften the ice cream for serving?
Let it sit at room temperature for 5‑7 minutes, or run the scoop under warm water for a smoother glide.
Nutrition Facts
per serving
210
Calories
20g
Protein
18g
Carbs
6g
Fat
Taste Profile
Smooth, coffee‑forward with a gentle sweet finish
Ingredient Substitutions
Don't have an ingredient? Try these alternatives
Choose an unsweetened variety to keep the flavor balanced
Pea protein works well but may add a slight earthiness
Recipe Variations
Try these delicious twists on the original
Spicy Version
Add a pinch of cayenne pepper and a drizzle of chocolate chili sauce for a gentle kick.
Mediterranean Style
Stir in finely chopped dark chocolate and a sprinkle of toasted pistachios after the final spin.
Common Mistakes to Avoid
Learn from others' mistakes for perfect results
- Using warm espresso, which can melt the base
- Skipping the chill step, resulting in a grainy texture
- Over‑spinning, which can make the ice cream too dense
Meal Prep & Storage
Make Ahead Tips
The base can be prepared up to 24 hours ahead; keep it covered in the fridge before the final freeze.
Leftover Ideas
Re‑scoop from the freezer and run a quick ‘re‑spin’ for a fresh creamy texture.
Perfect Pairings
Serve this with...
Cooking Timeline
Whisk together milk, protein powder, sweetener, and vanilla.
Stir in cooled espresso, cocoa, and salt until smooth.
Cover and refrigerate for at least 4 hours.
Transfer chilled mixture to Creami pint, run ‘Ice Cream’ cycle.
If needed, perform a ‘re‑spin’ for extra creaminess.
Scoop, garnish, and enjoy your mocha espresso protein ice cream.

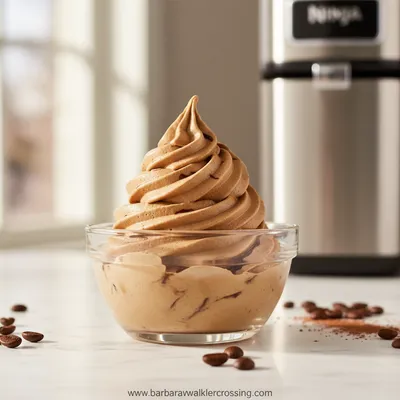
Mocha Espresso Protein Ice Cream
A silky, protein‑rich mocha espresso ice cream that feels like a gentle coffee hug, perfect for a post‑workout treat or a quiet afternoon indulgence.
Timing
Prep Time
15 Minutes
Cook Time
5 Minutes
Total Time
20 Minutes (plus 4‑hour chill)
Recipe Details
Ingredients
Base
-
01
2 cups unsweetened almond milk
-
02
1 scoop whey protein isolate (vanilla or unflavored)
-
03
1/3 cup maple syrup or honey
-
04
1 tsp pure vanilla extract
Coffee & Chocolate
-
01
1/2 cup strong brewed espresso, cooled
-
02
2 tbsp Dutch‑process cocoa powder
-
03
Pinch of sea salt
Instructions
Combine almond milk, protein powder, maple syrup, and vanilla in a large bowl; whisk until smooth, letting a few minutes for any powder to dissolve.
Stir in the cooled espresso, cocoa powder, and sea salt; whisk gently until the mixture is uniformly dark and glossy.
Cover the bowl and refrigerate for at least 4 hours, or overnight for deeper flavor integration.
Pour the chilled mixture into the Ninja Creami’s pint container, secure the lid, and run the ‘Ice Cream’ program.
If the texture feels a bit icy, use the ‘re‑spin’ function for an extra 30 seconds; then scoop into serving bowls.
Enjoy as is, or drizzle a little extra maple syrup and sprinkle a pinch of cocoa; serve immediately for the softest bite.
Notes & Tips
-
1
Make sure the espresso is fully cooled; warm coffee can melt the frozen base.
-
2
For a richer mocha, add a teaspoon of melted dark chocolate before freezing.
-
3
If the ice cream is too firm, let it sit a few minutes at room temperature before scooping.

Tools You'll Need
-
Ninja Creami machine
-
Whisk
-
Measuring cups and spoons
-
Large mixing bowl
-
Espresso maker or strong coffee brewer
Must-Know Tips
-
Don’t over‑mix the protein powder; a gentle whisk keeps it airy
-
Allow the mixture to chill thoroughly for the smoothest texture
-
Taste a spoonful after the first spin; adjust sweetness if needed
Professional Secrets
-
Use ice‑cold espresso to maintain the mixture’s temperature
-
Add a pinch of salt to enhance the coffee’s natural sweetness
-
Whisk in protein powder with a splash of milk first for a lump‑free blend

Recipe by
Barbara WalkerCooking with heart and heritage 🥘❤️ Sharing nostalgic flavors, family comfort, and timeless kitchen love ✨
Get Delicious Recipes Weekly
Join 25,000+ home cooks getting our best recipes straight to their inbox.
Free forever • No spam • Unsubscribe anytime