
The origin of granola dates back to the late 1800s when health‑focused cooks mixed rolled oats with honey and nuts as a portable breakfast. Over the decades, it turned into a pantry staple for hikers and busy families alike. This version skips the oven, keeping the spirit of the original while fitting modern lives. No fancy equipment—just a bowl, a spoon, and a bit of patience. The gentle sweetness of honey recalls evenings spent around a kitchen table, watching the firelight flicker, and the crunchy nuts bring a whisper of the woods outside.
Why You'll Love It
-
- No oven needed, perfect for summer days
-
- Quick to assemble, ready in under an hour
-
- Customizable with your favorite nuts and dried fruit
-
- Holds together well for lunchboxes or hikes
"These bars are my go‑to snack—soft, sweet, and never messy!"
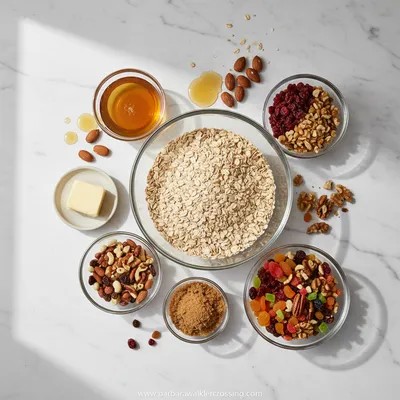
Essential Ingredient Guide
- Rolled oats: Choose thick, old‑fashioned oats for the best chew; they hold the bar together.
- Mixed nuts: A blend of almonds, walnuts, and pecans adds texture and a buttery feel.
- Honey: Acts as the sweet binder; a light drizzle provides a gentle floral note.
- Dried fruit: Cranberries or raisins give a pop of tartness that balances the sweetness.
- Coconut oil: Melts into the honey, creating a glossy coating that helps the bars set.
- Vanilla extract: Just a splash adds depth without overpowering the natural flavors.

Complete Cooking Process
-
Ingredient Readiness:
Measure and line a small pan with parchment; have all components within arm’s reach.
-
Flavor Development:
Warm honey, coconut oil, and vanilla just until they meld, then pour over oats and nuts.
-
Texture Control:
Press the mixture firmly into the pan, ensuring even density for a uniform bite.
-
Finishing Touches:
Let the bars chill in the refrigerator until firm, then cut into squares.
-
Serving Timing:
Enjoy immediately after chilling, or store for up to a week for a ready snack.
-
Press the mixture with the back of a spoon for an even surface.
-
If the mixture feels dry, add a teaspoon more honey.
-
For extra crunch, toast the nuts lightly before mixing.
-
Wrap individual bars in parchment for easy grab‑and‑go.
Pro Tips
I’ve found that letting the bars rest a few minutes after cutting helps them settle, so they don’t crumble. It’s a small pause that makes the experience feel more mindful. And, well, you can always drizzle a little more honey on top if you like a glossy finish. The simple act of cooling them turns a sticky batter into sturdy, satisfying bites.
 Baking, Bread & Sweet Comforts
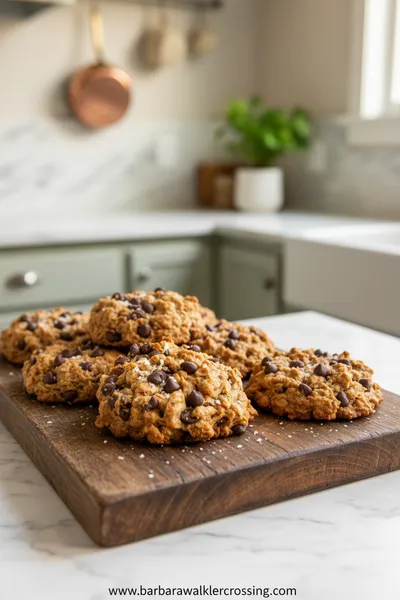
High Protein Cookie Dough
Nutritious cookie dough loaded with protein, easy to whip up and enjoy any time.
The essence of the dish:
What makes these bars special is the balance between sweet honey and the hearty chew of oats, all held together by a whisper of coconut oil.
A fun fact or historical angle:
Granola originally appeared in health magazines as a “birdseed” for people, and today it’s a beloved snack for hikers worldwide.
Flavor or sensory focus:
You’ll notice the toasted nut aroma first, followed by the soft, caramelized sweetness of honey that lingers on the palate.
You Must Know
-
Use old‑fashioned oats for texture
-
Press firmly for shape
-
Chill well before cutting
Frequently Asked Questions
→ Can I use maple syrup instead of honey?
Yes, you can swap honey for maple syrup; it will give a lighter flavor and a slightly softer texture.
→ How long can the bars be stored?
Keep them in an airtight container at room temperature for up to 5 days, or refrigerate for up to 2 weeks.
→ What nuts work best?
Almonds, walnuts, and pecans are all lovely; feel free to experiment with pistachios or hazelnuts.
→ Can I add chocolate chips?
Sure, add them after the honey mixture cools a bit so the chips don’t melt completely.
→ Is this recipe gluten‑free?
Use certified gluten‑free oats and verify all add‑ins are gluten‑free to make it safe.
→ How do I make them vegan?
Replace honey with agave nectar or rice syrup and ensure the chocolate (if used) is dairy‑free.
Nutrition Facts
per serving
210
Calories
5g
Protein
26g
Carbs
10g
Fat
Taste Profile
Warm, sweet‑nutty comfort
Ingredient Substitutions
Don't have an ingredient? Try these alternatives
Great for nut‑allergy friendly version; keep the same amount.
Provides similar sweetness with a milder flavor.
Recipe Variations
Try these delicious twists on the original
Spicy Version
Add ½ tsp cayenne pepper and a pinch of smoked paprika for a gentle heat.
Mediterranean Style
Swap dried fruit for chopped apricots, add pistachios, and drizzle with a touch of orange zest.
Common Mistakes to Avoid
Learn from others' mistakes for perfect results
- Using too much honey, making the bars overly sticky.
- Pressing too lightly, causing them to crumble.
- Skipping the chill step, resulting in soft, unshaped bars.
Meal Prep & Storage
Make Ahead Tips
You can mix and press the bars up to two days ahead; just keep them covered in the fridge.
Leftover Ideas
Re‑chill any leftover bars; they stay fresh and firm for another week.
Perfect Pairings
Serve this with...
Cooking Timeline
Gather and prep all ingredients; line the pan.
Warm honey, coconut oil, vanilla, and salt together.
Combine oats, nuts, dried fruit, and optional add‑ins; stir in the warm honey mixture.
Press mixture firmly into the pan and chill.
Allow bars to set, then cut and store.
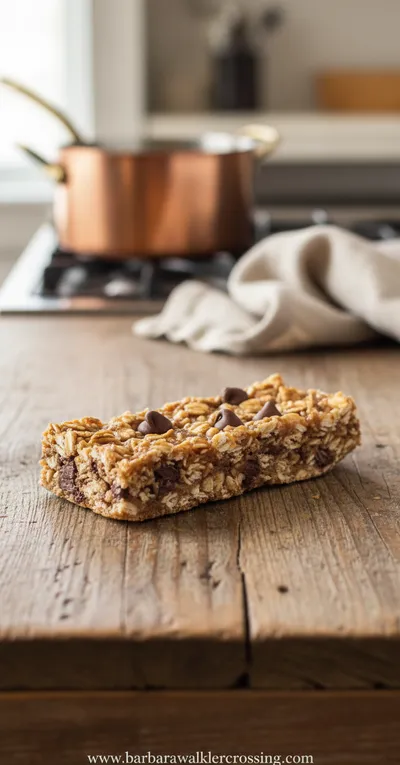
Homemade No Bake Granola Bars
A quick, chewy treat that feels like a warm hug on a busy day, these homemade no bake granola bars blend oats, honey, and nuts into a satisfying snack you can grab anytime.
Timing
Prep Time
15 Minutes
Cook Time
0 Minutes
Total Time
45 Minutes
Recipe Details
Ingredients
Main Ingredients
-
01
2 cups rolled oats
-
02
1 cup mixed nuts, roughly chopped
-
03
½ cup dried fruit (cranberries, raisins, or chopped dates)
-
04
⅓ cup honey
-
05
¼ cup coconut oil
-
06
1 tsp vanilla extract
-
07
¼ tsp sea salt
Optional Add‑Ins
-
01
2 tbsp mini chocolate chips
-
02
1 tbsp chia seeds
-
03
A pinch of cinnamon
Instructions
Line an 8×8‑inch pan with parchment paper, then set it aside.
In a small saucepan, gently warm honey, coconut oil, vanilla, and sea salt until everything melts together, about 2 minutes.
In a large bowl, combine rolled oats, chopped nuts, dried fruit, and any optional add‑ins; pour the warm honey mixture over, then stir until everything is evenly coated.
Transfer the mixture to the prepared pan, pressing down firmly with the back of a spoon or a piece of parchment to create an even layer.
Refrigerate for at least 30 minutes, then lift the parchment out and cut into 12 bars.
Notes & Tips
-
1
If the mixture feels too crumbly, add a teaspoon more honey and stir.
-
2
For extra chew, let the bars sit at room temperature for 10 minutes after cutting.
-
3
You can wrap individual bars in wax paper for on‑the‑go snacks.
Tools You'll Need
-
8×8‑inch pan
-
Parchment paper
-
Small saucepan
-
Mixing bowl
-
Spatula
-
Sharp knife
Must-Know Tips
-
Don't over‑mix the oats; it can become too dense.
-
Let the honey‑oil blend cool slightly before adding to oats.
-
Press firmly for uniform bars.
Professional Secrets
-
Use room‑temperature honey for easier mixing.
-
Warm the coconut oil just enough to melt, preserving its gentle flavor.
-
Chill the pan, not the mixture, to speed up setting.

Recipe by
Barbara WalkerCooking with heart and heritage 🥘❤️ Sharing nostalgic flavors, family comfort, and timeless kitchen love ✨
Get Delicious Recipes Weekly
Join 25,000+ home cooks getting our best recipes straight to their inbox.
Free forever • No spam • Unsubscribe anytime