
Red velvet, with its striking hue, originated in the early 20th‑century American South where cocoa was added to cake batter to keep it moist and improve color. Over time, beet juice or food coloring gave the signature crimson shade. This recipe honors that legacy while adapting it for modern gluten‑free diets, ensuring that everyone can enjoy the tradition without sacrifice.
Why You'll Love It
-
- Naturally gluten‑free, yet indulgent
-
- Vibrant color without artificial dyes
-
- Crispy edges with a soft, airy center
-
- Easy to make for weekend brunch
“These waffles are pure joy – the perfect balance of sweet and tender, and they look stunning on the plate!” – Jenna L.
Essential Ingredient Guide
- Gluten‑free flour blend: Choose a blend with xanthan gum for structure; it keeps the waffles tender.
- Beet powder or natural red food coloring: Beet powder adds color and a subtle earthy note; use just enough for a deep hue.
- Cocoa powder: Unsweetened cocoa deepens flavor and balances the sweetness.
- Almond milk: Provides creaminess; you can substitute oat milk if preferred.
- Buttermilk (dairy‑free): The acidity reacts with baking powder for lift; a plant‑based version works well.
- Pure vanilla extract: A few drops heighten the aroma without overwhelming the red velvet profile.
Complete Cooking Process
-
Ingredient Readiness:
Sift the flour, cocoa, and baking powder together; whisk the wet ingredients separately to ensure even color.
-
Flavor Development:
Allow the batter to rest for a few minutes; this lets the beet powder fully hydrate and the cocoa release its aroma.
-
Texture Control:
Pre‑heat the waffle iron and lightly grease; pour just enough batter to cover without spilling.
-
Finishing Touches:
After cooking, dust with a whisper of powdered sugar or a drizzle of maple syrup.
-
Serving Timing:
Serve immediately while the exterior is still crisp and the interior remains warm.
-
Separate egg whites and beat to stiff peaks; fold in for extra fluffiness.
-
Add a teaspoon of melted butter to the batter for richer mouthfeel.
-
If the batter seems thick, thin with a splash of extra almond milk.
Pro Tips
Well, these little adjustments make a big difference. I often find that a rested batter gives the waffles a more uniform crumb, and the whipped egg whites lift them like a gentle cloud. So take a moment to let the mixture sit – it’s a quiet step that rewards you with a perfectly tender bite.

The essence of the dish:
Rich cocoa, a hint of beet sweetness, and a light gluten‑free crumb combine for a breakfast that feels both nostalgic and fresh.
A fun fact or historical angle:
Red velvet was originally a “poor man’s” cake; the addition of cocoa and beet helped retain moisture in humid southern kitchens.
Flavor or sensory focus:
You’ll first notice the warm cocoa aroma, followed by a subtle earthiness from the beet, then a sweet, buttery finish.
You Must Know
-
Do not over‑mix; a few lumps are fine.
-
Use a hot waffle iron for that signature crisp.
-
Serve straight away for best texture.
Frequently Asked Questions
→ Can I use regular flour?
You could, but the texture will change. A gluten‑free blend with xanthan gum keeps the waffles tender and airy.
→ What if I don’t have beet powder?
A few drops of natural red food coloring work fine, though beet powder adds a subtle earthy note.
→ Is this recipe dairy‑free?
Yes, just use dairy‑free butter and almond milk, or your favorite plant‑based alternatives.
→ How long do the waffles keep?
Store them in an airtight container for up to two days; reheat in a toaster or oven to restore crispness.
→ Can I add chocolate chips?
Absolutely – fold in a quarter cup of gluten‑free chocolate chips for extra decadence.
→ What’s a good topping?
A dollop of whipped coconut cream, fresh berries, or a drizzle of maple syrup complement the flavor perfectly.
Nutrition Facts
per serving
320
Calories
9g
Protein
45g
Carbs
10g
Fat
Taste Profile
Rich cocoa with a gentle sweet earthiness
Ingredient Substitutions
Don't have an ingredient? Try these alternatives
Choose unsweetened to keep sugar balanced.
Use sparingly; the flavor will be less earthy.
Recipe Variations
Try these delicious twists on the original
Spicy Version
Add a pinch of cayenne and a drizzle of honey‑chipotle sauce for a subtle kick.
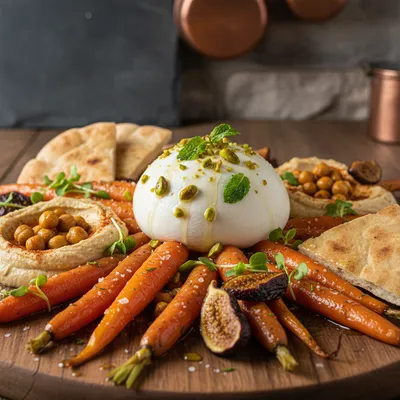
Mediterranean Style
Top with crumbled feta, toasted pistachios, and a drizzle of honey.
Common Mistakes to Avoid
Learn from others' mistakes for perfect results
- Over‑mixing batter, leading to dense waffles.
- Using cold ingredients; they don’t rise as well.
- Opening the iron too early, causing loss of steam.
Meal Prep & Storage
Make Ahead Tips
You can whisk the dry ingredients together and store in an airtight jar for up to 2 weeks. Whisk wet ingredients separately and refrigerate for 24 hours; combine just before cooking.
Leftover Ideas
Reheat gently in a toaster oven; serve with fresh fruit to revive the bright flavor.
Perfect Pairings
Serve this with...
Cooking Timeline
Gather and measure all ingredients; whisk dry components.
Whisk wet ingredients, combine with dry, and fold in beaten egg whites.
Pre‑heat waffle iron, grease lightly, and begin cooking batches.
Finish cooking, keep waffles warm in a low oven while you finish batch.
Plate, garnish, and serve immediately.

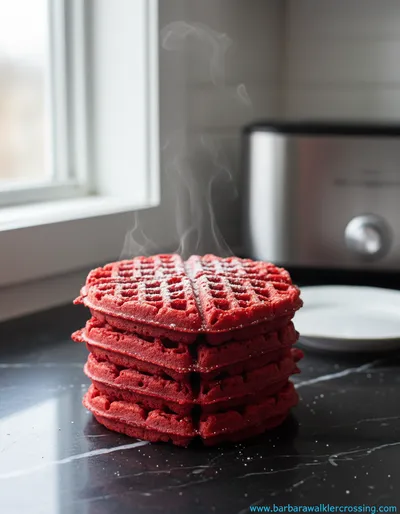
Gluten Free Red Velvet Waffles
Fluffy gluten free red velvet waffles, crisp on the outside and soft inside, perfect for a cozy breakfast or brunch. I love pairing them with a cup of tea and a dollop of whipped cream. For a sweeter twist, try them with red velvet cookies on the side.
Timing
Prep Time
15 Minutes
Cook Time
12 Minutes
Total Time
27 Minutes
Recipe Details
Ingredients
Main Ingredients
-
01
1 1/2 cups gluten‑free flour blend
-
02
2 tbsp cocoa powder
-
03
1 tsp baking powder
-
04
1/2 tsp baking soda
-
05
1/4 tsp salt
-
06
2 tbsp beet powder (or 1 tsp natural red food coloring)
-
07
2 tbsp sugar
-
08
2 large eggs, separated
-
09
1 cup almond milk
-
10
2 tbsp melted dairy‑free butter
-
11
1 tsp vanilla extract
Instructions
In a bowl, whisk together flour, cocoa, baking powder, baking soda, salt, beet powder, and sugar.
In another bowl, beat the egg yolks with almond milk, melted butter, vanilla, and the red coloring until smooth.
Combine wet and dry mixtures, stirring just until incorporated; the batter will be slightly lumpy.
In a clean bowl, whisk egg whites to stiff peaks and gently fold into the batter for extra fluff.
Pre‑heat the waffle iron, lightly grease, and pour enough batter to cover. Cook until edges are crisp and the interior springs back, about 4‑5 minutes.
Notes & Tips
-
1
If the batter seems too thick, add a splash of almond milk.
-
2
Do not over‑mix; a few streaks are fine and will disappear during cooking.
-
3
For an extra touch, swirl a spoonful of raspberry jam into the batter before cooking.
 Baking, Bread & Sweet Comforts
High Protein Cookie Dough
Nutritious cookie dough loaded with protein, easy to whip up and enjoy any time.
Tools You'll Need
-
Waffle iron
-
Mixing bowls
-
Whisk
-
Electric mixer (optional for egg whites)
-
Spatula
-
Measuring cups and spoons
Must-Know Tips
-
Do not overcrowd the iron; give each waffle room to expand.
-
Let the batter rest for 5 minutes to hydrate the beet powder.
-
Taste the batter before cooking; adjust sugar if needed.
Professional Secrets
-
Room‑temperature ingredients ensure even cooking.
-
A hot iron creates that signature golden‑crisp edge.
-
Folding egg whites gently preserves air bubbles for lift.

Recipe by
Barbara WalkerCooking with heart and heritage 🥘❤️ Sharing nostalgic flavors, family comfort, and timeless kitchen love ✨
Get Delicious Recipes Weekly
Join 25,000+ home cooks getting our best recipes straight to their inbox.
Free forever • No spam • Unsubscribe anytime