
Sugar cookies have been a staple of American baking since colonial times, evolving from simple treats to elaborate creations that celebrate every occasion. The tradition of themed cookies for sporting events began in the early 20th century when home bakers started creating treats to share during radio broadcasts of big games. Today, football-themed cookies continue this tradition, bringing fans together with edible symbols of their team spirit. The combination of crisp sugar cookies and colorful icing has become as much a part of game day as cheering from the stands.
Why You'll Love It
-
Perfect for any football gathering or game day celebration
-
Customizable with your team's colors and decorations
-
Make-ahead friendly – bake the cookies days in advance
-
Fun activity to do with kids who love sports and baking
"These cookies were the star of our Super Bowl party! Everyone loved the stadium design and they tasted incredible." - Sarah, football mom
Essential Ingredient Guide
- Unsalted butter: Use room temperature butter for proper creaming. It should indent slightly when pressed but still hold its shape. This creates the perfect cookie texture that's both tender and slightly crumbly.
- Granulated sugar: The right amount of sugar gives these cookies their signature crisp edge and soft center. Don't reduce it too much or the cookies won't spread properly or develop that lovely golden color.
- Pure vanilla extract: Real vanilla makes all the difference here. The warm, floral notes complement the buttery cookie base beautifully and make your kitchen smell absolutely heavenly while they bake.
- All-purpose flour: Measure your flour properly by spooning it into the measuring cup and leveling it off. Too much flour can make the cookies tough, while too little makes them spread too thin.
- Green food coloring: For the football field effect. Gel food coloring works best as it won't thin out your royal icing. Start with a little and add more until you get that perfect grassy green.
- Royal icing: This dries hard, making it perfect for detailed decorations. Make sure it's the right consistency – not too runny, not too stiff – for drawing those goal posts and yard lines.
Complete Cooking Process
-
Ingredient Readiness:
Everything should be at room temperature, especially the butter and eggs. Cold butter won't cream properly with the sugar, and cold eggs can make your cookie dough separate. I usually take everything out about an hour before I start baking.
-
Flavor Development:
The magic happens during the creaming stage. When you beat the butter and sugar together until light and fluffy, you're incorporating air that makes the cookies tender. The vanilla gets fully distributed here too, ensuring every bite has that warm, comforting flavor.
-
Texture Control:
Chilling the dough is non-negotiable. It firms up the butter so the cookies hold their stadium shape better and don't spread too much in the oven. I usually chill mine for at least two hours, sometimes overnight if I'm planning ahead.
-
Finishing Touches:
The decoration stage is where the football field comes to life. Let the cookies cool completely before icing, and work in small batches so the icing doesn't dry out. The goal posts need a steady hand, but honestly, imperfect lines just make them look homemade in the best way.
-
Serving Timing:
These cookies are best served the same day they're decorated for optimal crispness, but the baked cookies can be stored for up to a week in an airtight container. If you're making them for a party, bake the cookies ahead and decorate the morning of your event.
-
Use a stadium-shaped cookie cutter for perfect results every time
-
Roll dough between parchment paper to prevent sticking
-
Let icing dry completely between different colors
-
Keep unused dough chilled while working in batches
Pro Tips
I've found that the key to perfect stadium cookies is patience. Rushing the chilling or decorating stages never turns out well. The dough needs time to relax, and the icing needs time to set. When my grandson helps me, he always wants to ice them right away, but I gently remind him that good things take time.
Another thing – don't stress about making every cookie look identical. Honestly, the slight variations make them special. Some goal posts might be a little wobbly, some yard lines might curve a bit – it just adds to their charm. What matters most is the love you put into them and the joy they bring to your gathering.

The essence of the dish:
These cookies capture the excitement of game day in edible form. They're not just sweets; they're little edible stadiums that bring people together. The combination of buttery sugar cookie and crisp royal icing creates a texture contrast that's incredibly satisfying.
A fun fact or historical angle:
Sugar cookies became popular in America in the 1700s when German settlers in Pennsylvania created the Nazareth sugar cookie using a recipe they brought from Europe. The modern decorated sugar cookie trend took off in the 20th century with the invention of food coloring and pre-made cookie cutters.
Flavor or sensory focus:
The first thing you'll notice is the crisp snap of the royal icing giving way to the tender, buttery cookie beneath. The vanilla scent is warm and inviting, while the visual appeal of the football field design makes these cookies as fun to look at as they are to eat.
You Must Know
-
Don't skip chilling the dough – it prevents spreading
-
Use gel food coloring for vibrant colors that won't thin icing
-
Decorate on a cool, dry day for best icing results
-
Store decorated cookies in single layers to prevent smudging
Frequently Asked Questions
→ Can I make these cookies ahead of time?
Absolutely! The baked cookies (without icing) can be stored in an airtight container for up to a week. You can also freeze the dough for up to 3 months. Decorate the cookies within 24 hours of serving for the best texture.
→ What if I don't have a stadium cookie cutter?
No worries! You can use a rectangular cutter and trim the corners, or even hand-cut the shape using a knife and a paper template. The important part is the football field decoration.
→ How do I get my royal icing the right consistency?
For outlining, you want icing that holds a peak but still flows smoothly. For flooding (filling), add a few drops of water at a time until it flows like honey. Test on a plate first to make sure it spreads but doesn't run off the cookie.
→ Can I make these gluten-free?
Yes, you can use a 1:1 gluten-free flour blend. The texture might be slightly different, but they'll still be delicious. Make sure your baking powder is gluten-free too.
→ How long does the icing take to dry completely?
It depends on humidity, but usually 4-6 hours for a firm set, up to 24 hours for completely hard. Don't stack them until they're fully dry or the decorations will smudge.
→ Can I use buttercream instead of royal icing?
You can, but buttercream won't dry hard, so the decorations might smear. Royal icing is best for detailed work like goal posts and yard lines. If you prefer buttercream, keep the decorations simple.
Nutrition Facts
per serving
180
Calories
2g
Protein
25g
Carbs
8g
Fat
Taste Profile
Classic sweet sugar cookie with buttery vanilla notes
Ingredient Substitutions
Don't have an ingredient? Try these alternatives
Texture may be slightly different but will work for dairy-free needs
Check that your blend contains xanthan gum for proper structure
Won't dry hard but works for simpler decorations
Recipe Variations
Try these delicious twists on the original
Team Colors Version
Use your favorite team's colors for the field and decorations instead of traditional green and white
Chocolate Stadium Cookies
Add 1/4 cup cocoa powder to the dough and use white icing for contrast
Mini Stadium Bites
Use a smaller cookie cutter for bite-sized treats perfect for large parties
Common Mistakes to Avoid
Learn from others' mistakes for perfect results
- Using butter that's too soft or melted – causes cookies to spread
- Overmixing the dough after adding flour – creates tough cookies
- Not chilling dough sufficiently – results in misshapen cookies
- Decorating warm cookies – causes icing to melt and smear
Meal Prep & Storage
Make Ahead Tips
The dough can be made and chilled up to 3 days in advance. Baked cookies (without icing) can be stored for a week. You can even freeze the baked cookies for up to 3 months – just thaw completely before decorating.
Leftover Ideas
Store leftover decorated cookies in an airtight container with parchment between layers. They're perfect for lunchboxes or afternoon snacks throughout the week. The cookies may soften slightly over time but will still taste delicious.
Perfect Pairings
Serve this with...
Cooking Timeline
Gather and measure all ingredients, bring butter and eggs to room temperature
Mix cookie dough, divide and wrap for chilling
Chill dough – this is the perfect time to clean up or prepare other game day food
Roll, cut, and bake cookies in batches
Let cookies cool completely on wire racks
Prepare and color royal icing, decorate cookies
Let icing dry completely before serving or storing
 Baking, Bread & Sweet Comforts
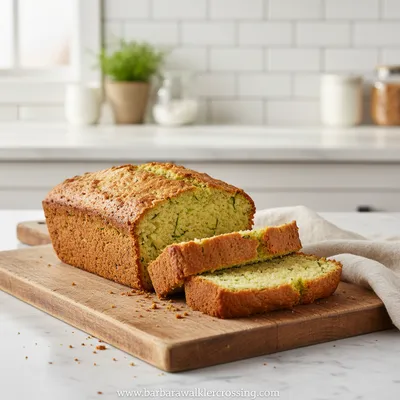
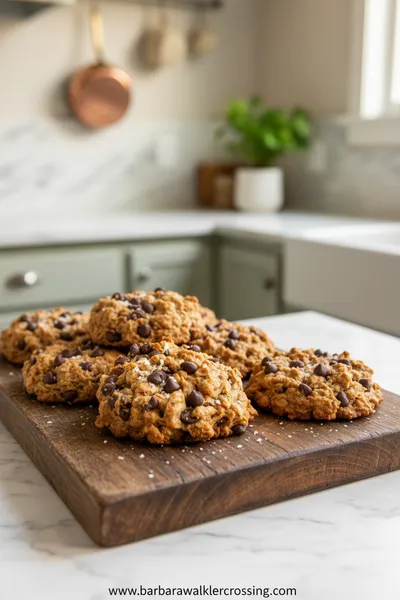
High Protein Cookie Dough
Nutritious cookie dough loaded with protein, easy to whip up and enjoy any time.
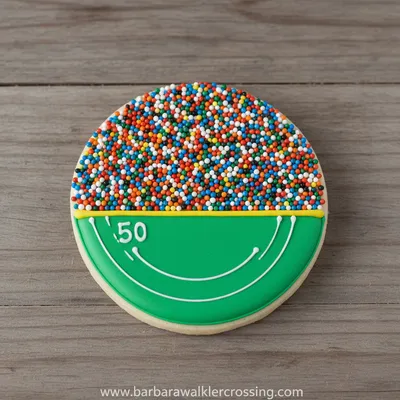
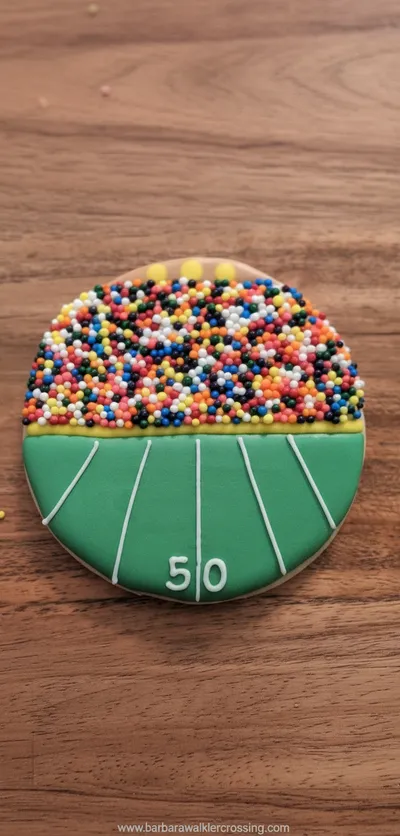
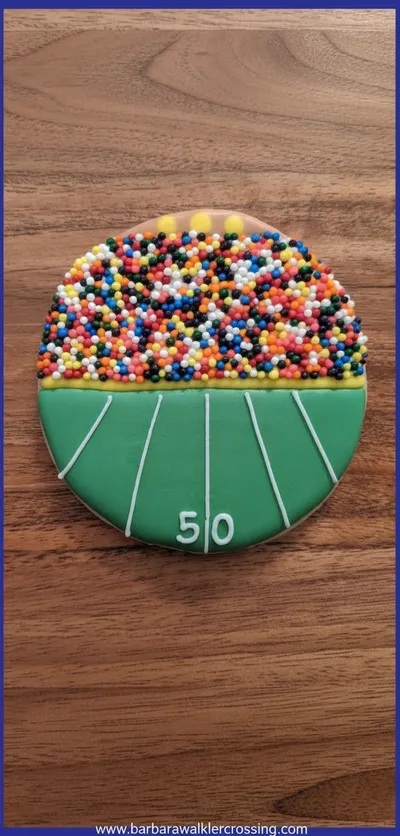
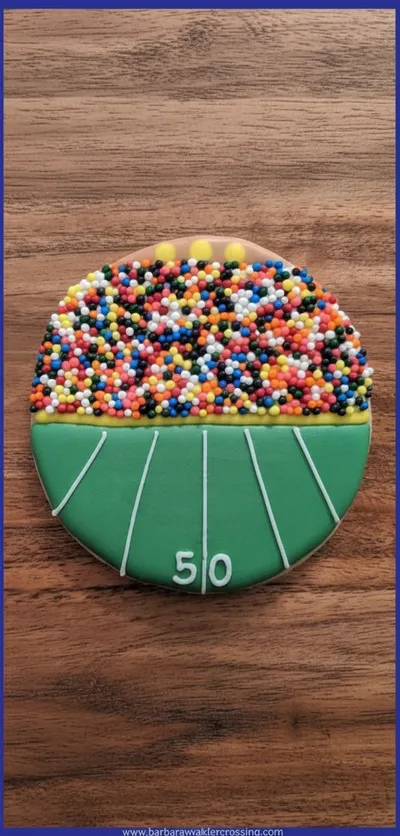
Football Stadium Sugar Cookies Recipe
Create these adorable football stadium sugar cookies that bring the spirit of game day right to your kitchen. Perfect for tailgating parties, football gatherings, or any festive occasion where you want to score a touchdown with your baking skills.
Timing
Prep Time
45 Minutes
Cook Time
12 Minutes
Total Time
3 Hours 30 Minutes
Recipe Details
Ingredients
Sugar Cookie Dough
-
01
1 cup (2 sticks) unsalted butter, room temperature
-
02
1 cup granulated sugar
-
03
1 large egg, room temperature
-
04
2 teaspoons pure vanilla extract
-
05
3 cups all-purpose flour
-
06
1 1/2 teaspoons baking powder
-
07
1/2 teaspoon salt
Royal Icing
-
01
4 cups powdered sugar
-
02
3 tablespoons meringue powder
-
03
6-8 tablespoons warm water
-
04
Green gel food coloring
-
05
Black gel food coloring
Instructions
In a large bowl, cream together the softened butter and granulated sugar until light and fluffy, about 3-4 minutes. Add the egg and vanilla extract, mixing until fully incorporated. In a separate bowl, whisk together flour, baking powder, and salt. Gradually add the dry ingredients to the butter mixture, mixing until just combined.
Divide the dough in half and shape each portion into a disk. Wrap tightly in plastic wrap and chill in the refrigerator for at least 2 hours, or until firm. This step is crucial for cookies that hold their shape – don't rush it.
Preheat oven to 350°F (175°C). Line baking sheets with parchment paper. On a lightly floured surface, roll out one disk of dough to about 1/4-inch thickness. Use a stadium-shaped cookie cutter to cut out cookies, transferring them to prepared baking sheets about 2 inches apart.
Bake for 10-12 minutes, or until the edges are just beginning to turn golden. The centers should still look soft. Let cookies cool on baking sheets for 5 minutes before transferring to wire racks to cool completely.
While cookies cool, make the royal icing. In a large bowl, combine powdered sugar and meringue powder. Gradually add warm water while mixing on low speed. Increase speed to high and beat for 5-7 minutes until stiff peaks form.
Divide icing into portions for different colors. Tint most of the icing green for the football field, a small portion black for goal posts and yard lines, and leave some white for details. Transfer to piping bags fitted with small round tips.
Pipe green icing onto each cookie to create the football field, leaving space for goal posts at each end. Use black icing to pipe goal posts at both ends and yard lines across the field. Add white details like player numbers if desired. Let icing dry completely before serving or storing.
Notes & Tips
-
1
Cookies can be baked up to a week in advance and stored in an airtight container
-
2
Undecorated cookie dough can be frozen for up to 3 months
-
3
For crispier cookies, bake 1-2 minutes longer until golden brown around edges
-
4
If icing becomes too thick, add water a teaspoon at a time until desired consistency
Tools You'll Need
-
Stadium-shaped cookie cutter
-
Stand mixer or hand mixer
-
Rolling pin
-
Parchment paper
-
Baking sheets
-
Wire cooling racks
-
Piping bags and small round tips
-
Food coloring gels
Must-Know Tips
-
Chill dough thoroughly – this prevents cookies from spreading too much
-
Don't overmix the dough – stop as soon as ingredients are combined
-
Let cookies cool completely before decorating – warm cookies make icing melt
-
Work with one color of icing at a time to prevent drying out
Professional Secrets
-
Room temperature ingredients – ensures even mixing and proper texture
-
Roll dough between parchment – prevents sticking without extra flour
-
Rotate baking sheets halfway through – for even browning
-
Test one cookie first – adjust baking time if needed

Recipe by
Barbara WalkerCooking with heart and heritage 🥘❤️ Sharing nostalgic flavors, family comfort, and timeless kitchen love ✨
Get Delicious Recipes Weekly
Join 25,000+ home cooks getting our best recipes straight to their inbox.
Free forever • No spam • Unsubscribe anytime