
The chocolate chip cookie is an American icon, born from a happy accident in the 1930s at the Toll House Inn. While the traditional round cookie is timeless, the transition into 'bars' reflects a shift toward the practical, home-style baking that defined mid-century family gatherings. It was about feeding a crowd without sacrificing that coveted, buttery richness.
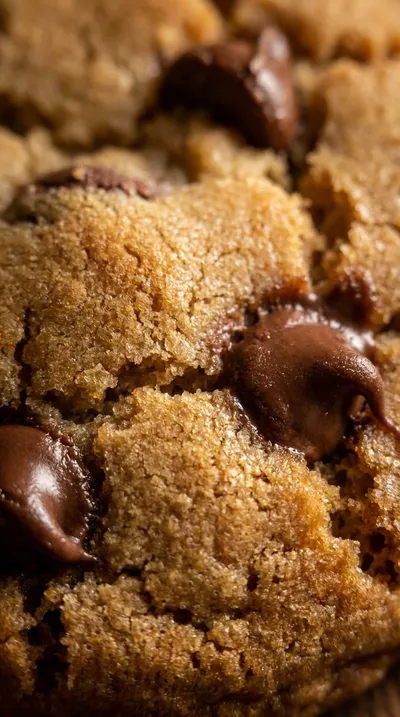
At its heart, the chewy chocolate chip cookie bars format is all about moisture retention. By baking the dough in a concentrated mass, the edges caramelize while the center stays dense and fudgy, creating a textural contrast that individual cookies sometimes lack. It is a method that celebrates efficiency and abundance.
Over the decades, this style of baking became a staple for school potlucks and holiday trays. The inclusion of 2 1/4 cups all-purpose flour and a touch of baking soda ensures a sturdy yet tender crumb that can hold a generous amount of chocolate. It is a recipe that has evolved from a hotel kitchen to the heart of the modern home.
Why You'll Love It
-
- Honestly, the texture is just wonderful; they're so soft and chewy, it reminds me of the treats I used to make for school bake sales.
-
- Well, look, the best part is that you don't have to scoop individual cookies, so it's a bit more relaxed in the kitchen.
-
- I mean, who can resist the smell of 2 cups semi-sweet chocolate chips melting into a warm oven? It just fills the whole house with a cozy scent.
-
- Yeah, they're a guaranteed crowd-pleaser because they hit that perfect sweet spot between a cookie and a brownie.
"Finally, a recipe that actually stays soft! My grandkids absolutely love these bars, and I love how easy they are to make."
Essential Ingredient Guide
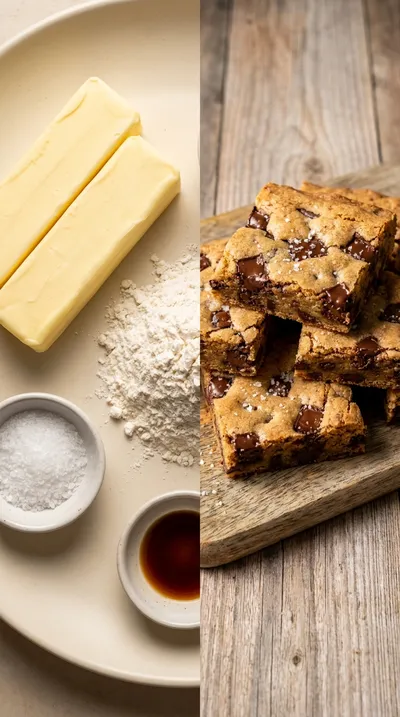
- 1 cup (2 sticks) unsalted butter, softened: Make sure it's truly softened, not melted, unless you're going for that extra chewy secret. I've found that letting it sit on the counter for an hour works best for a fluffy batter.
- 2 cups semi-sweet chocolate chips: These provide those little pockets of melted gold throughout the bars. I like to use a generous hand here so every single bite has plenty of chocolate.
- Coarse sea salt, for sprinkling: This is optional, but wow, it really wakes up the flavor. Just a tiny pinch on top creates a lovely contrast with all that sweetness.
- 1 teaspoon salt: Don't skip this part, even with the chocolate. A little bit of salt in the dry mix actually makes the chocolate taste richer, believe it or not.
- 1 teaspoon vanilla extract: This is where that warm, nostalgic aroma comes from. A good quality extract just adds a little bit of heart to the whole batch.
- 3/4 cup packed light brown sugar: The brown sugar is what gives us that deep, molasses-like chewiness. Make sure to pack it firmly into the cup for the best results.
Complete Cooking Process
-
Ingredient Readiness:
I always start by making sure my butter is soft and the oven is preheated to 350°F. Lining that 9x13 inch baking pan with parchment paper is a lifesaver so nothing sticks.
-
Flavor Development:
The magic happens when you cream the sugars and butter for a few minutes until they're light and fluffy. That's when the base of the flavor really starts to build before the eggs and vanilla join in.
-
Texture Control:
When adding the 2 1/4 cups all-purpose flour and other dry ingredients, mix on low and stop as soon as it's combined. If you overwork it, ugh, you'll lose that beautiful chewy texture.
-
Finishing Touches:
Before sliding them into the oven, I love to smooth the top with a spatula and add a sprinkle of coarse sea salt. It makes the bars look so professional and taste even better.
-
Serving Timing:
The hardest part is waiting for them to cool completely in the pan. If you cut them too early, they might pull apart, so just be patient for those clean squares.
-
For extra chewy bars, try using slightly melted butter instead of softened.
-
Don't overbake! Check them at 25 minutes; a few moist crumbs on a toothpick is perfect.
-
Try browning your butter first to add a deeper, nuttier flavor to the dough.
-
Use the parchment paper overhang to lift the entire block out of the pan easily.
Pro Tips
Just trust your instincts and enjoy the process!
Better For You Treats
Ways to Make it Your Own
Serving Suggestions
Frequently Asked Questions
→ How do I know when they're actually done without overbaking?
Look for golden brown edges and a toothpick that comes out with a few moist crumbs. If it's completely clean, you might have gone a minute too far!
→ Can I store these for later?
Yes, they stay lovely in an airtight container at room temperature for about 3 days. You can even freeze them for up to 2 months if you want a stash for later.
→ What if I don't have a 9x13 inch baking pan?
You can use a similar sized rectangular pan, but just keep an eye on the bake time. If the pan is smaller and the dough is deeper, they might need a few extra minutes.
Nutrition Facts
per serving
320
Calories
4g
Protein
35g
Carbs
18g
Fat
Taste Profile
A rich, classic sweetness with a hint of salt to balance it out.
Ingredient Substitutions
Don't have an ingredient? Try these alternatives
Reduce the added salt by a pinch if using salted butter.
For a deeper, less sweet flavor profile.
Recipe Variations
Try these delicious twists on the original
Peanut Butter Chocolate Chip Bars
For a nutty twist, add 1/2 cup of peanut butter to the wet ingredients in step 2 and reduce the butter by 1/4 cup.
Salted Caramel Chocolate Chip Bars
Make it extra decadent by drizzling the baked and cooled cookie bars with your favorite salted caramel sauce.
Common Mistakes to Avoid
Learn from others' mistakes for perfect results
- Overmixing the dough, which makes the bars tough instead of chewy.
- Overbaking, which dries out the center.
- Cutting the bars while they are still hot, causing them to fall apart.
Meal Prep & Storage
Make Ahead Tips
You can freeze these bars for up to 2 months in an airtight container; just thaw them completely before serving.
Leftover Ideas
Keep leftover bars in an airtight container at room temperature for up to 3 days to maintain their chewiness.
Perfect Pairings
Serve this with...
Cooking Timeline
Preheat oven and line the baking pan.
Cream together the butter and sugars until fluffy.
Mix in eggs, vanilla, and gradually add dry ingredients.
Fold in chocolate chips and spread dough into the pan.
Bake for 25-30 minutes and allow to cool completely.

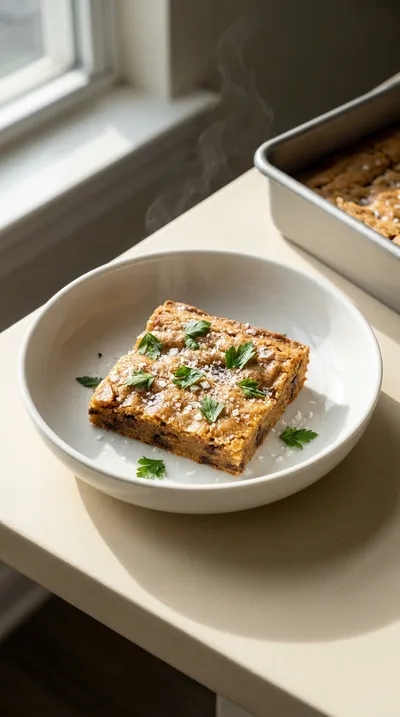
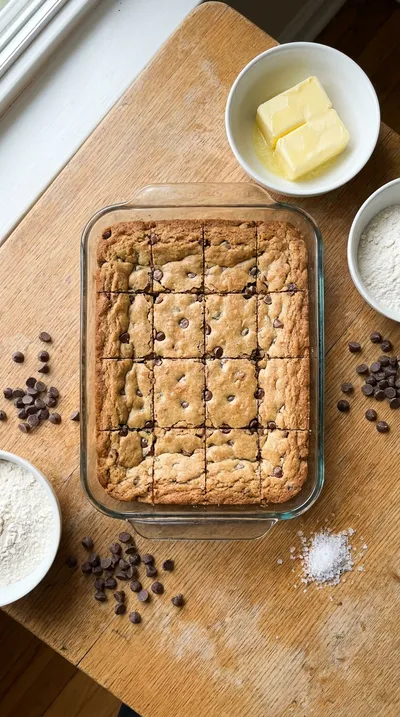
Chewy Chocolate Chip Cookie Bars
Warm your kitchen with the scent of melting semi-sweet chocolate chips and brown sugar. These chewy chocolate chip cookie bars are soft, buttery, and just the right amount of sweet for a quiet afternoon treat.
Timing
Prep Time
15 Minutes
Cook Time
25-30 Minutes
Total Time
40-45 Minutes
Recipe Details
Ingredients
Main Ingredients
-
01
1 cup (2 sticks) unsalted butter, softened
-
02
3/4 cup granulated sugar
-
03
3/4 cup packed light brown sugar
-
04
2 large eggs
-
05
1 teaspoon vanilla extract
-
06
2 1/4 cups all-purpose flour
-
07
1 teaspoon baking soda
-
08
1 teaspoon salt
-
09
2 cups semi-sweet chocolate chips
Garnish
-
01
Optional: Coarse sea salt, for sprinkling
Instructions
First things first, go ahead and preheat your oven to 350°F (175°C). Line your 9x13 inch baking pan with some parchment paper. Just a little tip: leave a bit of an overhang on the sides; honestly, it makes lifting the bars out so much easier later on.
In a nice large bowl, cream together that softened butter, granulated sugar, and brown sugar. Use your mixer for about 3-5 minutes until it looks light and fluffy. I mean, don't rush this part, it's where the magic happens.
Now, gently beat in the eggs one at a time, and then stir in the vanilla extract. Just a splash of vanilla makes everything feel like home, doesn't it?
In a separate little bowl, whisk your flour, baking soda, and salt. I always do this just to make sure the leavening agent is spread evenly—no surprises in the dough!
Gradually add those dry ingredients into the wet mix. Keep your mixer on low speed and stop as soon as it's combined. Look, please be careful not to overmix, or we'll lose that chewy texture we're after.
Fold in the semi-sweet chocolate chips until they're evenly distributed. Wow, the dough smells wonderful at this stage.
Spread the dough evenly into your prepared pan. Use a spatula to smooth everything out so every piece is the same size.
If you're feeling fancy, sprinkle a pinch of coarse sea salt over the top. It adds a lovely contrast to the sweetness, yeah?
Bake for 25-30 minutes. You're looking for golden brown edges and a toothpick in the center that comes out with just a few moist crumbs.
Now comes the hard part: let the bars cool completely in the pan. Once they're set, use that parchment paper to lift them out, cut them into squares, and enjoy.
Notes & Tips
-
1
Parchment paper is a lifesaver for clean edges.
-
2
Avoid overmixing the batter to keep the bars soft.
-
3
Checking for doneness at 25 minutes prevents overbaking.
 Baking, Bread & Sweet Comforts
High Protein Cookie Dough
Nutritious cookie dough loaded with protein, easy to whip up and enjoy any time.
Tools You'll Need
-
9x13 inch baking pan for an even bake
-
Parchment paper to prevent sticking
-
Electric mixer (stand or hand) for creaming butter
-
Mixing bowls for wet and dry ingredients
-
Measuring cups and spoons for accuracy
-
Spatula for smoothing the dough
Must-Know Tips
-
Don't overbake, Slightly underbaked bars are much chewier than overbaked ones.
-
Use slightly melted butter, Not hot, just melted to add extra moisture for a chewier result.
-
Check early, Start checking for doneness at the 25-minute mark.
Professional Secrets
-
Brown the butter first to deepen the flavor dramatically.
-
Cream butter and sugars for a full 3-5 minutes to ensure a light, fluffy texture.
-
Whisk dry ingredients separately to guarantee even distribution of baking soda.

Recipe by
Barbara WalkerCooking with heart and heritage 🥘❤️ Sharing nostalgic flavors, family comfort, and timeless kitchen love ✨
Get Delicious Recipes Weekly
Join 25,000+ home cooks getting our best recipes straight to their inbox.
Free forever • No spam • Unsubscribe anytime