
Baked ziti has its roots in Italian-American cooking, evolving from traditional pasta al forno dishes that families would prepare for Sunday dinners and special occasions. The dish became particularly popular in the mid-20th century as Italian immigrants adapted their recipes to American ingredients and ovens. What makes it special is how it transforms humble ingredients into something celebratory - the way the pasta absorbs the sauce flavors while baking, creating layers of comfort in every bite. It's a testament to how immigrant communities created new traditions while honoring their heritage.
Why You'll Love It
-
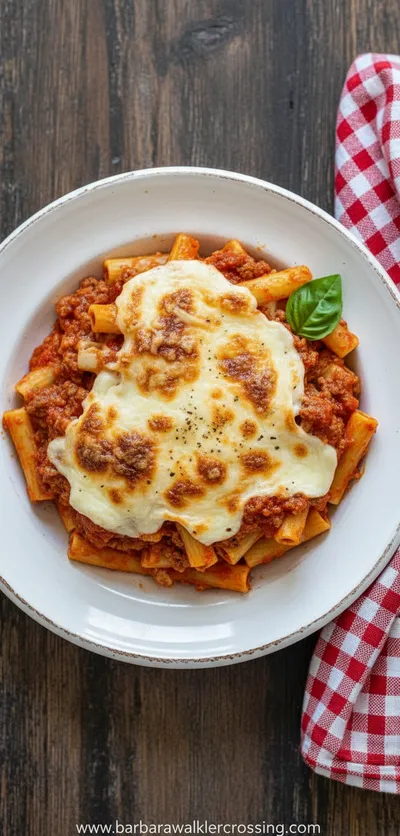
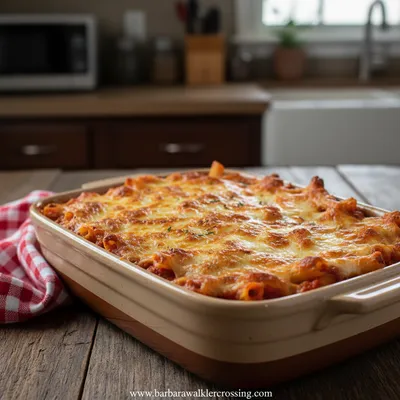
The cheese gets wonderfully golden and bubbly on top
-
It reheats beautifully for leftovers throughout the week
-
Perfect for feeding a crowd with minimal effort
-
The flavors deepen and meld together as it bakes
"My family requests this every Sunday - it's become our new tradition. The cheese crust is absolutely perfect!"
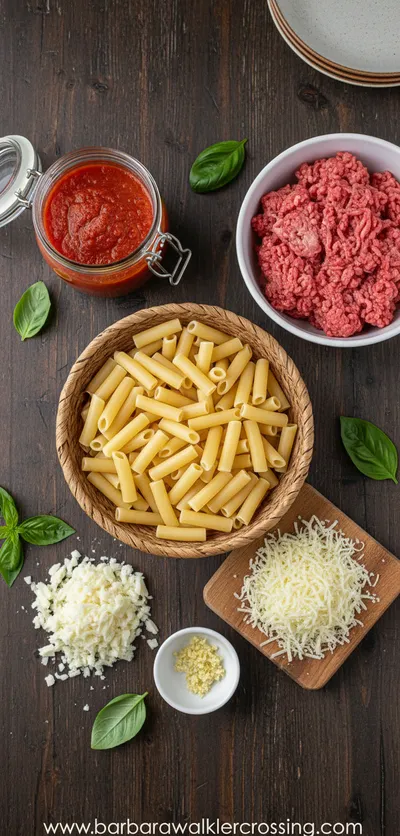
Essential Ingredient Guide
- Ziti pasta: The tube shape captures sauce beautifully. Look for good quality semolina pasta that holds its shape well during baking.
- Beef sausage: I use beef sausage instead of pork for a rich, savory depth. Remove from casings and brown it well for maximum flavor.
- Ricotta cheese: Full-fat ricotta gives the creamiest texture. Let it come to room temperature so it blends smoothly with the other ingredients.
- Mozzarella cheese: Freshly shredded melts better than pre-shredded. I like to use whole milk mozzarella for that stretchy, gooey quality.
- Parmesan cheese: Freshly grated Parmesan adds a salty, nutty flavor that balances the richness. The real stuff makes all the difference.
- Tomato sauce: A good quality marinara or your favorite spaghetti sauce works beautifully here.
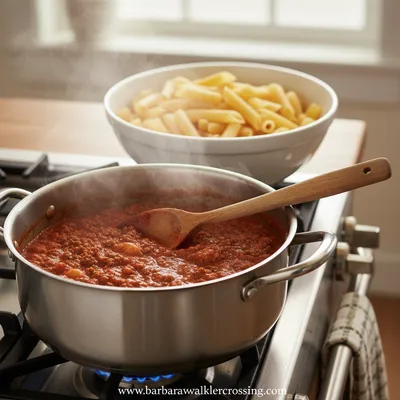
Complete Cooking Process
-
Ingredient Readiness:
Having everything prepped before you start makes the process flow smoothly. Cook the pasta just until al dente since it will continue cooking in the oven.
-
Flavor Development:
Browning the beef sausage properly creates a foundation of deep, savory notes that will infuse the entire dish during baking.
-
Texture Control:
The pasta should have some bite left before baking. The cheeses will melt into creamy pockets between the pasta tubes.
-
Finishing Touches:
Letting the ziti rest for 10-15 minutes after baking allows the sauce to settle and makes serving much cleaner.
-
Serving Timing:
Serve while still warm from the oven when the cheese is at its stretchiest and most inviting.
-
Undercook the pasta by 2 minutes - it continues cooking in the oven
-
Mix some sauce with the pasta before layering to prevent dryness
-
Let it rest before serving for cleaner cuts
-
Use a mix of cheeses for the most complex flavor
Pro Tips
You know, I've made this recipe so many times over the years, and these little tricks really do make a difference. The resting time especially - it used to drive me crazy when I'd cut into it right away and everything would ooze everywhere. Now I've learned patience pays off.
Another thing I've noticed - the quality of your tomato sauce really shines through here. Since it's such a central flavor, using one you truly love makes the whole dish better. I sometimes make a big batch of sauce on the weekend and freeze portions specifically for dishes like this.
The essence of the dish:
It's all about comfort and community. This isn't fancy food - it's honest, satisfying nourishment that brings people together around the table.
A fun fact or historical angle:
While ziti pasta originates from Southern Italy, the baked version with meat sauce is largely an Italian-American creation that became popular in the 1950s.
Flavor or sensory focus:
You'll notice the way the creamy cheeses contrast with the tangy tomato sauce, and how the pasta soaks up all those wonderful flavors while maintaining its structure.
You Must Know
-
Don't overcook the pasta initially - it will soften more while baking
-
Layer generously with cheese for the best texture
-
Let it rest before serving for cleaner portions
-
The flavors improve overnight if you have leftovers
Frequently Asked Questions
→ Can I make baked ziti ahead of time?
Absolutely. Assemble it completely, cover tightly, and refrigerate for up to 24 hours. Add an extra 10-15 minutes to the baking time if baking straight from the refrigerator.
→ What's the difference between baked ziti and lasagna?
While both are baked pasta dishes, ziti uses tube-shaped pasta mixed with sauce and cheese, while lasagna features flat sheets layered with fillings. Ziti is generally quicker to assemble.
→ Can I freeze baked ziti?
Yes, it freezes beautifully. Cool completely, wrap tightly, and freeze for up to 3 months. Thaw in the refrigerator overnight before reheating.
→ What pasta can I substitute for ziti?
Penne works wonderfully as it has a similar shape. Rigatoni or mostaccioli would also be good substitutes that hold sauce well.
→ How do I prevent my baked ziti from drying out?
Make sure you have enough sauce, and don't overbake. Covering with foil for the first part of baking helps retain moisture.
→ Can I make this vegetarian?
Certainly! Omit the beef sausage and add sautéed mushrooms or eggplant for a meaty texture, or simply increase the cheese and vegetable content.
Nutrition Facts
per serving
485
Calories
28g
Protein
45g
Carbs
22g
Fat
Taste Profile
Savory and rich with balanced tomato acidity and creamy cheese notes
Ingredient Substitutions
Don't have an ingredient? Try these alternatives
Season well with Italian herbs if using plain ground meat
Any tube-shaped pasta with ridges to hold sauce works well
Blend until smooth for a similar texture
Recipe Variations
Try these delicious twists on the original
Vegetarian Ziti
Omit the beef sausage and add sautéed mushrooms, spinach, or roasted eggplant for a meat-free version that's equally satisfying.
Four-Cheese Ziti
Add fontina and provolone to the cheese mixture for an even richer, more complex flavor profile.
Common Mistakes to Avoid
Learn from others' mistakes for perfect results
- Overcooking the pasta before baking results in mushy texture
- Not browning the meat sufficiently reduces flavor depth
- Skipping the resting time makes serving messy
- Using cold ricotta makes mixing difficult
Meal Prep & Storage
Make Ahead Tips
You can assemble the entire dish up to 24 hours in advance and refrigerate until ready to bake. Add 10-15 minutes to the baking time if starting from cold.
Leftover Ideas
Leftovers reheat beautifully in the oven or microwave. The flavors often taste even better the next day as they continue to meld together.
Perfect Pairings
Serve this with...
Cooking Timeline
Preheat oven, start boiling water for pasta, chop vegetables
Cook pasta, brown beef sausage with onions and garlic
Mix cheese filling, combine with pasta, begin layering in baking dish
Complete layering, add final cheese topping
Bake covered for 25 minutes, then uncovered for 10-15 minutes
Rest before serving, garnish with fresh parsley

Best Baked Ziti Recipe
This comforting baked ziti recipe brings together tender pasta, savory beef sausage, and creamy cheeses in a dish that feels like a warm hug. It's the kind of meal that fills your kitchen with the most wonderful aromas and brings everyone to the table with happy anticipation.
Timing
Prep Time
20 Minutes
Cook Time
35 Minutes
Total Time
55 Minutes
Recipe Details
Ingredients
Pasta and Meat
-
01
1 pound ziti pasta
-
02
1 pound beef sausage, casings removed
-
03
1 tablespoon olive oil
-
04
1 medium onion, finely chopped
-
05
3 cloves garlic, minced
Sauce and Cheese Mixture
-
01
4 cups marinara sauce
-
02
15 ounces whole milk ricotta cheese
-
03
2 cups shredded mozzarella cheese, divided
-
04
1 cup grated Parmesan cheese, divided
-
05
1 large egg
-
06
1/4 cup fresh basil, chopped
-
07
1 teaspoon dried oregano
-
08
1/2 teaspoon salt
-
09
1/4 teaspoon black pepper
For Topping
-
01
1/2 cup shredded mozzarella cheese
-
02
1/4 cup grated Parmesan cheese
-
03
2 tablespoons fresh parsley, chopped
Instructions
Preheat your oven to 375°F. Bring a large pot of salted water to boil. Cook the ziti according to package directions, but reduce the cooking time by 2 minutes since it will continue cooking in the oven. Drain well and set aside.
While the pasta cooks, heat olive oil in a large skillet over medium heat. Add the beef sausage, breaking it up with a spoon, and cook until browned, about 6-8 minutes. Add the chopped onion and cook until softened, about 5 minutes. Stir in the garlic and cook for another minute until fragrant.
In a large bowl, combine the ricotta cheese, 1 cup of mozzarella, 1/2 cup of Parmesan, egg, basil, oregano, salt, and pepper. Mix until well combined. Add the drained pasta and gently toss to coat the pasta with the cheese mixture.
Spread about 1 cup of marinara sauce in the bottom of a 9x13 inch baking dish. Spoon half of the pasta mixture into the dish and spread evenly. Top with half of the remaining sauce and all of the cooked beef sausage mixture.
Add the remaining pasta mixture, then spread the rest of the sauce over the top. Sprinkle with the remaining 1/2 cup mozzarella and 1/2 cup Parmesan cheeses.
Cover with foil and bake for 25 minutes. Remove the foil and bake for another 10-15 minutes until the cheese is bubbly and golden brown. Let it rest for 10-15 minutes before serving. Sprinkle with fresh parsley just before serving.
Notes & Tips
-
1
The pasta will continue to absorb sauce as it sits, so if making ahead, you might want to add an extra 1/2 cup of sauce
-
2
Letting the ziti rest before serving makes it much easier to portion cleanly
-
3
You can prepare the meat sauce up to 2 days in advance to save time
Tools You'll Need
-
9x13 inch baking dish
-
Large pot for boiling pasta
-
Large skillet
-
Mixing bowls
-
Colander
-
Wooden spoon
-
Measuring cups and spoons
Must-Know Tips
-
Undercook the pasta by 2 minutes - it softens more while baking
-
Brown the beef sausage well for maximum flavor development
-
Let the ziti rest before serving for cleaner cuts
-
Use room temperature ricotta for easier mixing
Professional Secrets
-
Mix some sauce with the pasta before layering to prevent dryness
-
A combination of cheeses creates the best flavor and texture
-
Resting time allows the layers to set properly
-
Fresh herbs added at the end brighten up the rich flavors

Recipe by
Isabella MooreCelebrating life with flavor 🎉🍽️ Creating magical seasonal dishes full of warmth, joy, and delicious taste ✨
Get Delicious Recipes Weekly
Join 25,000+ home cooks getting our best recipes straight to their inbox.
Free forever • No spam • Unsubscribe anytime